
Foam continued...
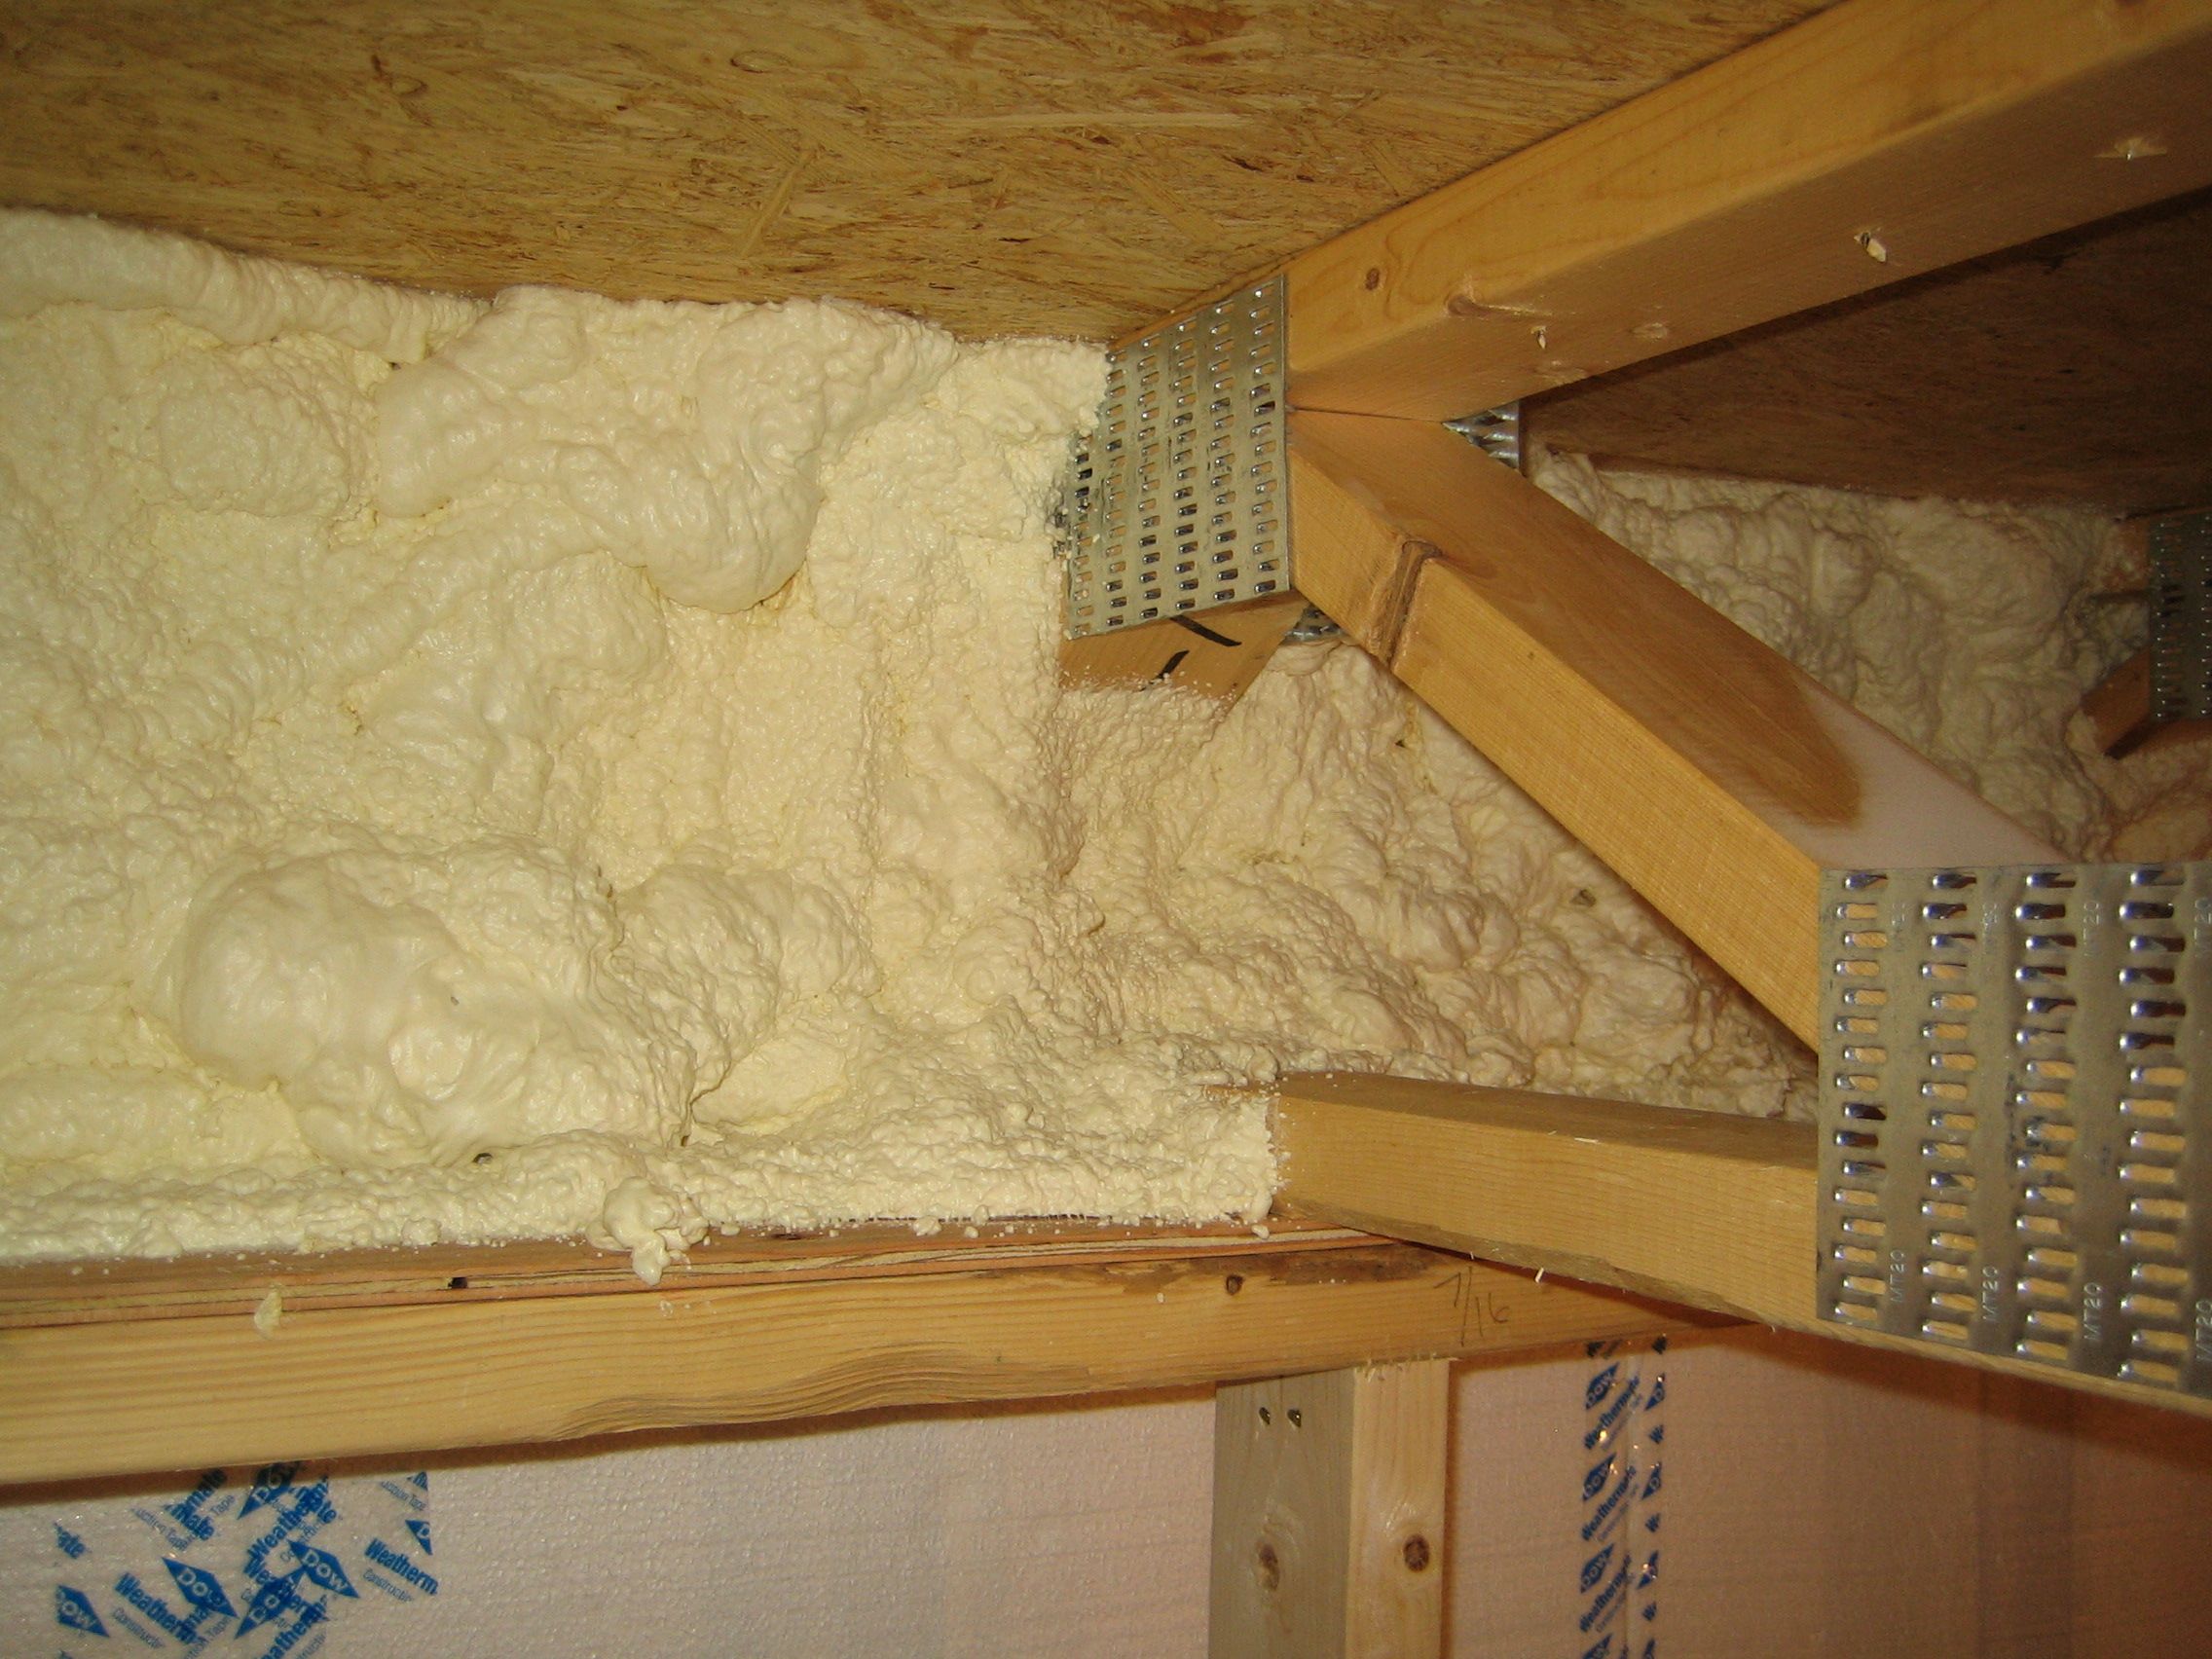

While the solar installers have been on the roof, Warren and I have been in the basement foaming the rim joist area. We are foaming this area for two reasons. First, we need to seal the water proofing barrier to the top of the concrete wall. The water proofing is also our air barrier and keeps any radon gas from seeping out at the top of the wall. Second, this would be a difficult and time consuming area to staple up a net and blow cellulose.
Here’s the rundown on our approach.
-
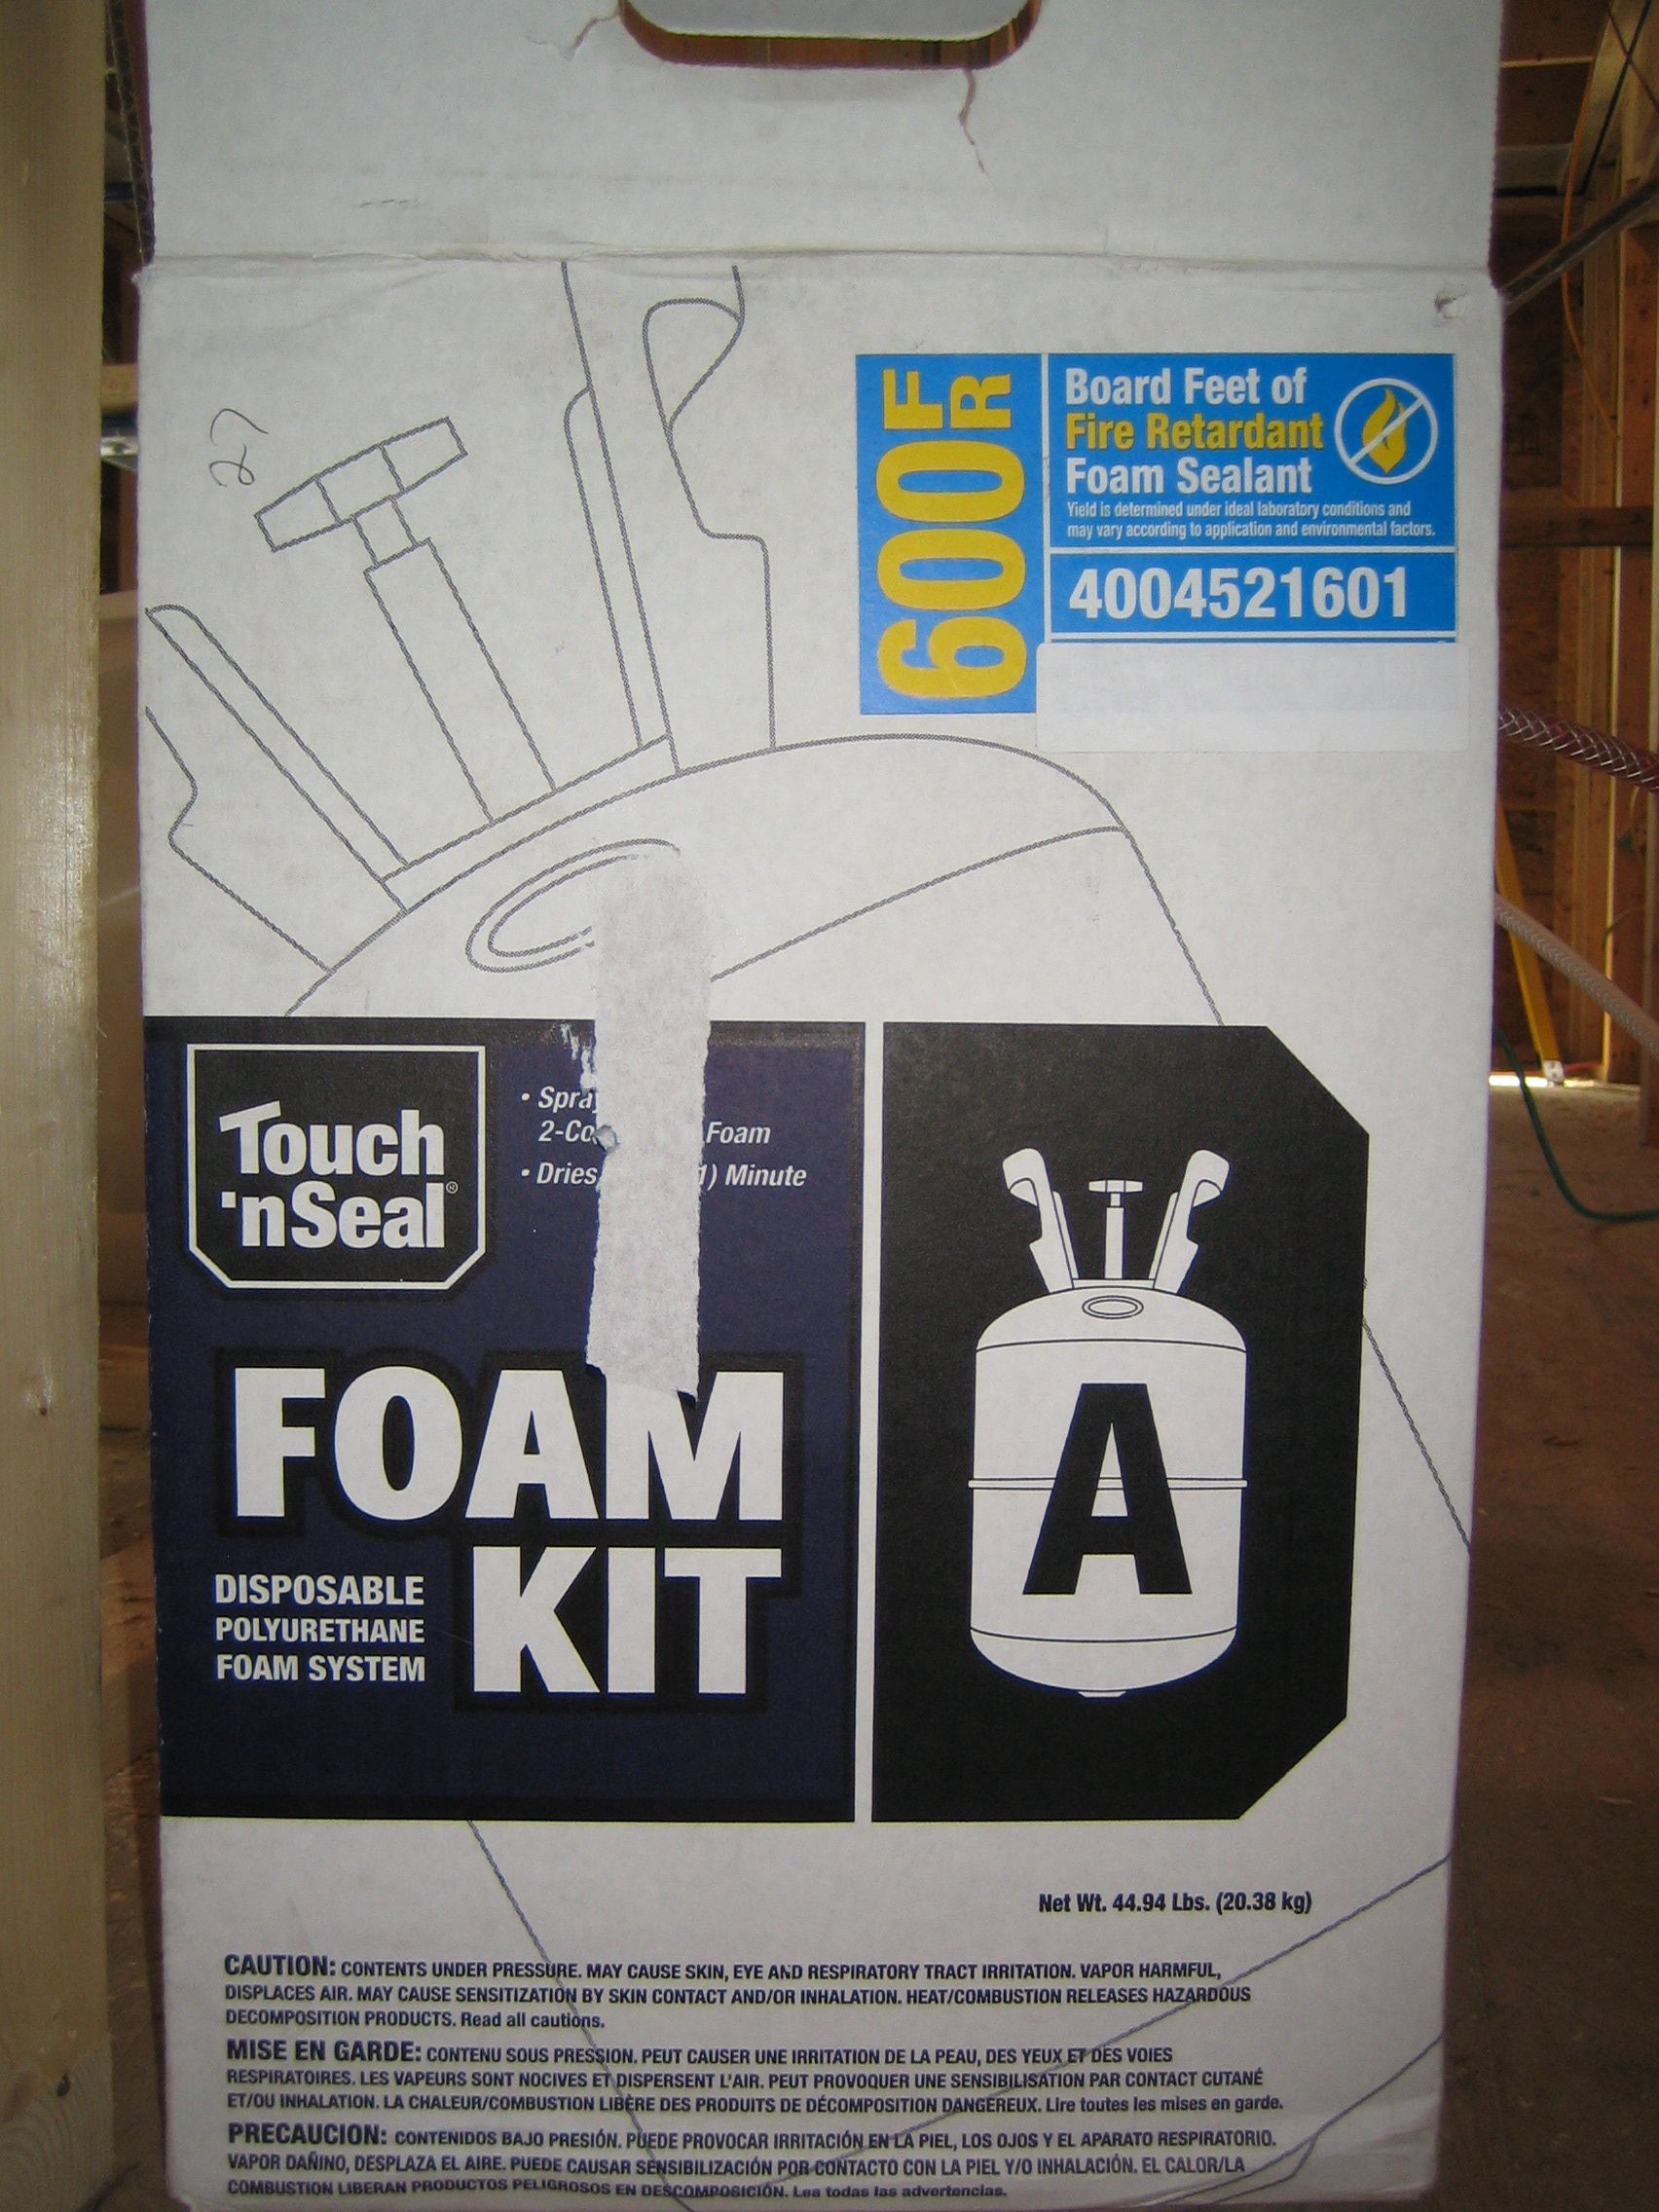
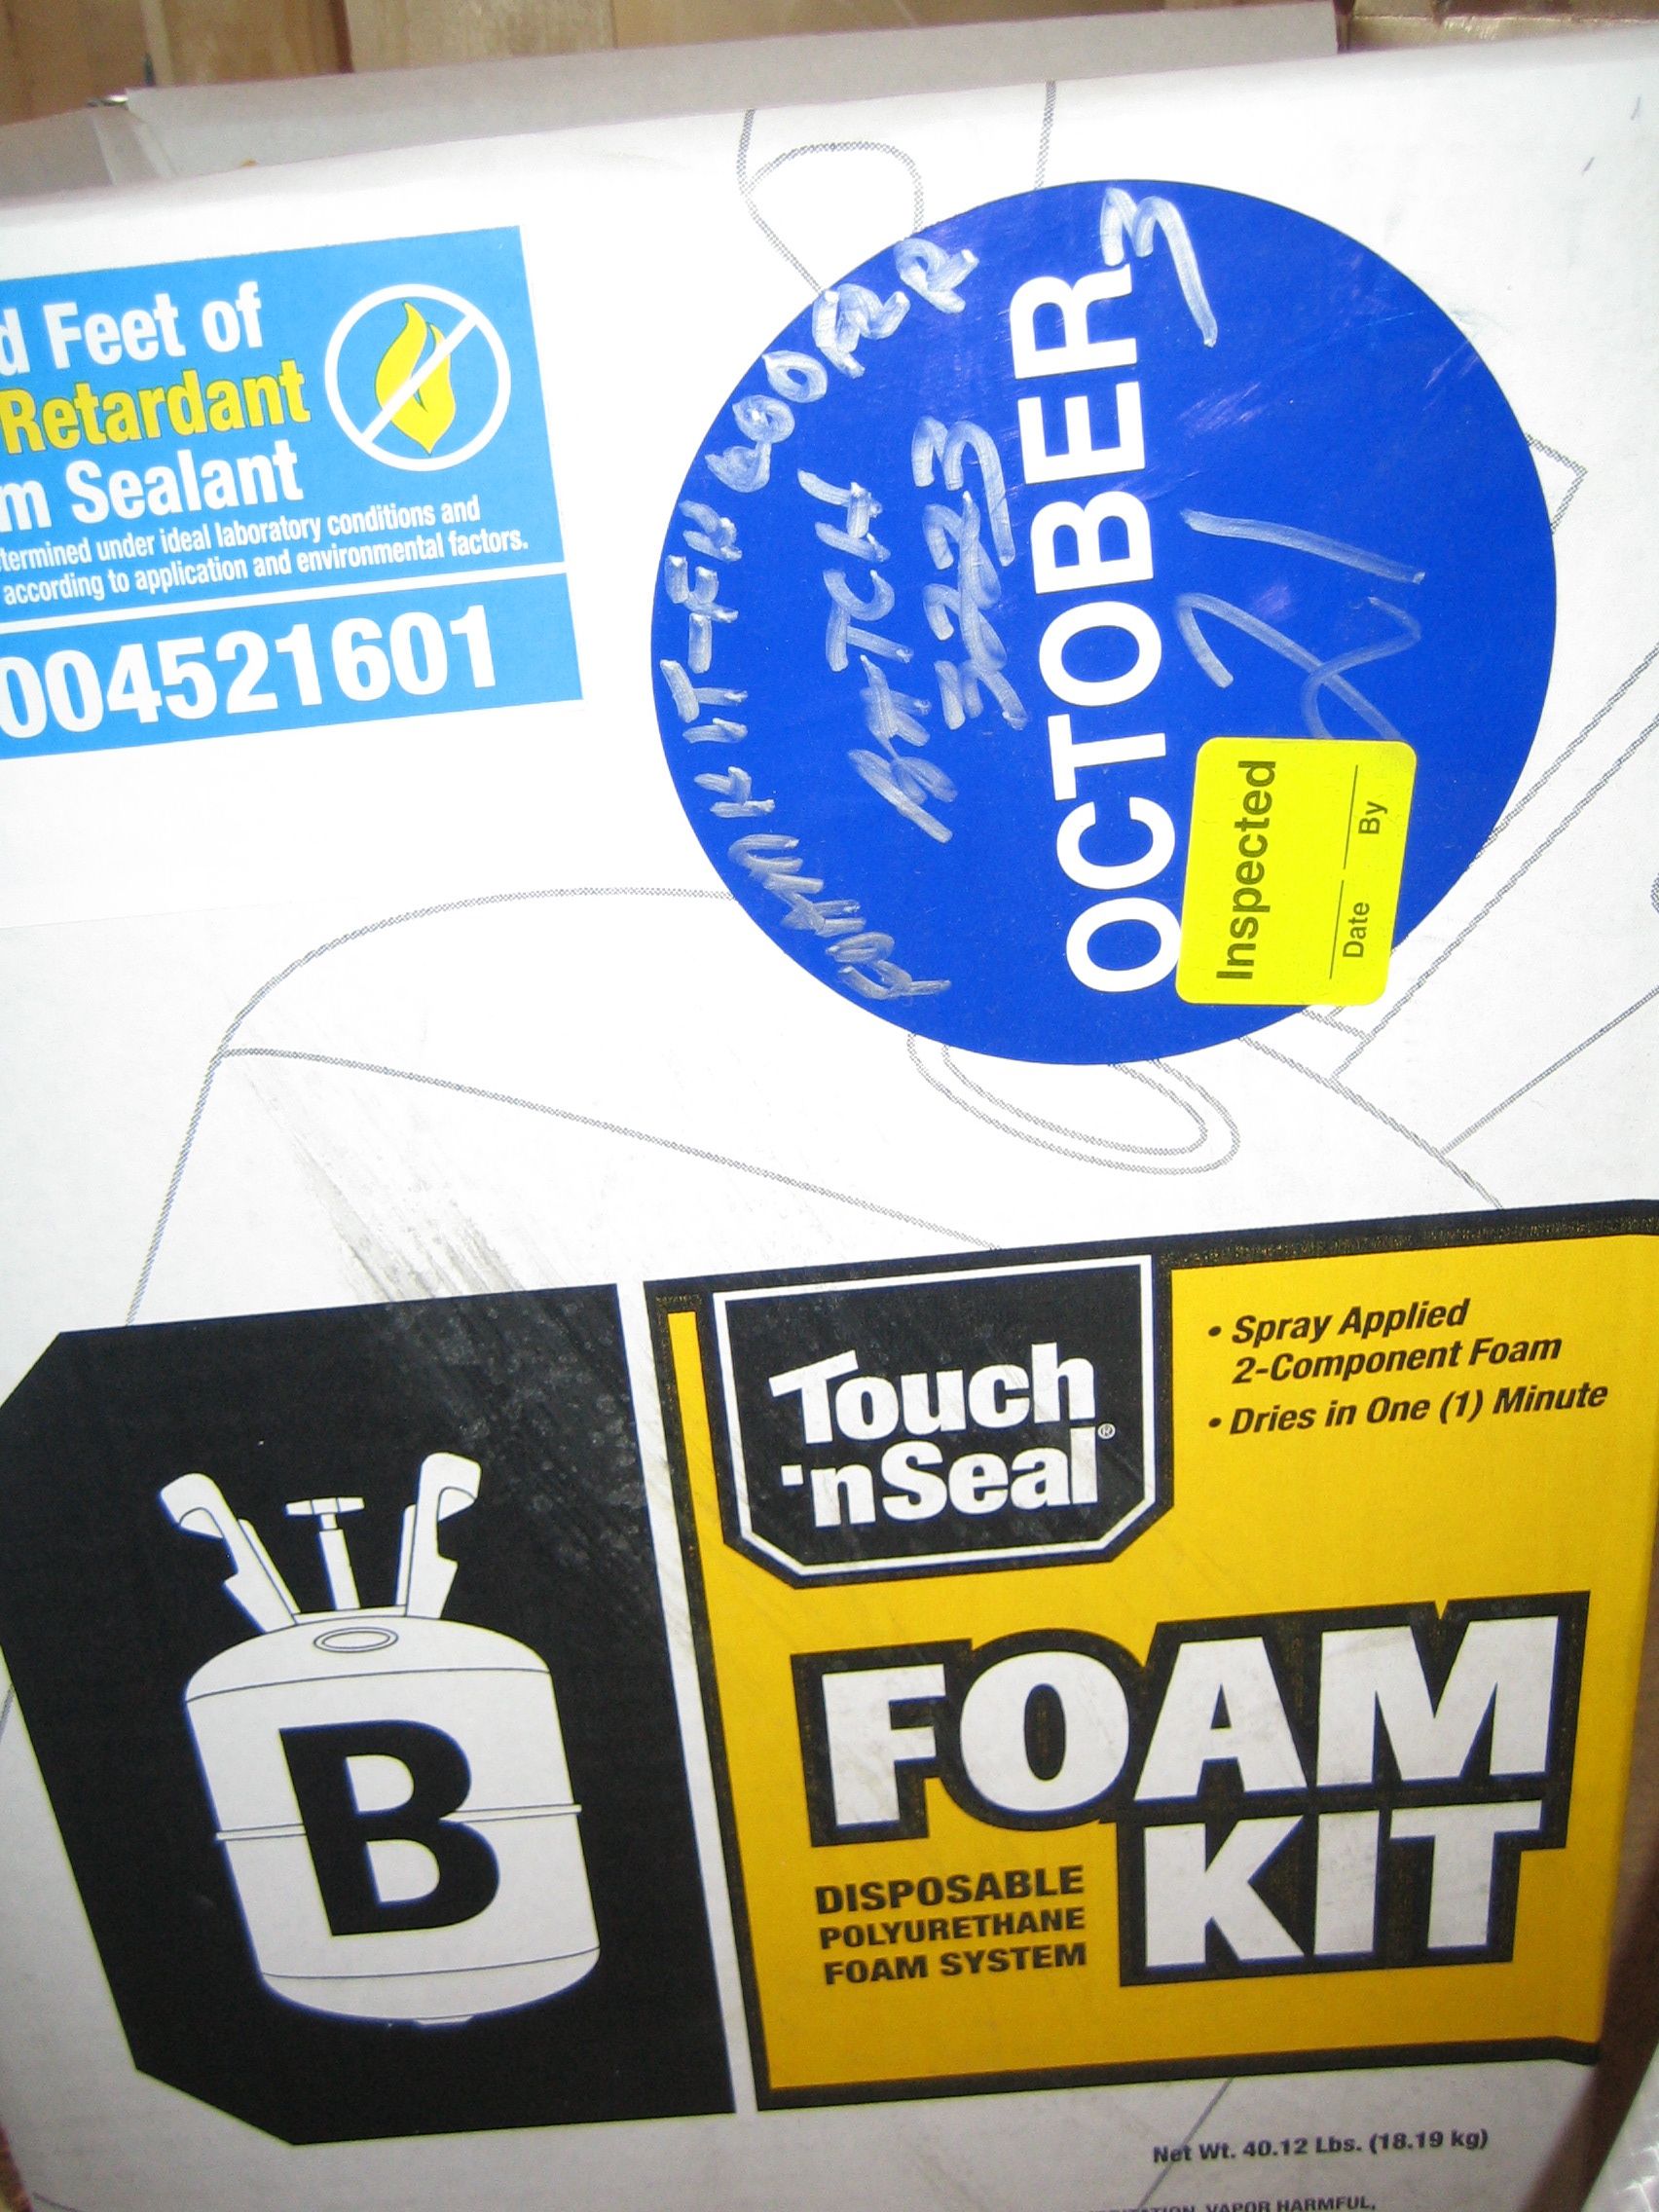
We’re using a two part foam made by Touch’n Seal. They make standard and fire retardant type foams. We’re using the fire retardant type because we’re not planning to finish off the basement ceiling any time soon.
-
We are foaming this area to a thickness of 7 to 9 inches to ensure we meet our stated R40 minimum. The foam is rated at 6.23 R per inch for the fire retardant type. The R value is a bit higher for the standard foam.
-
We’re using the 600 board feet kit. It includes two tanks, A (white) and B (red). We bought the longer hose set, 30 feet. There are 2 hoses. The liquid from each tank is combined at the nozzle where it combines with air to create high expansion foam. The nozzles are replaceable. We’ve used quite a few as the foam clogs them easily.
-
The temperatures have been in the 60’s and 70’s, but the foam really works best at higher temperatures. The tanks should be at 80 to 90 degrees before use and the surface temperature where you’re spraying should be above 70 degrees. Warren built a foam box that we use to warm up the tanks before use. We dropped in a small electric space heater to get them up to the required temperature range.
-
There’s a bit of conflicting information as to the surface temperature. We asked because we were experiencing some shrinkage away from the wall. The foam would expand initially, then pull away from the wall slightly as it cured. It only takes few minutes to cure. But the second and third sprayings seem to be doing a better job. The first application pulls away a bit, then provides support for the next application, holding it in place better. Our last spray day was quite warm out, but the higher surface temperatures didn’t seem to make a difference.
We’ve used 3 kits so far and have covered the attic rim area and half the basement rim area. We’re guessing we’ll need a little over 2 more kits to finish the basement and foam the north and south rim joists at the second floor. The east and west rim areas at the second floor are easy enough to net and blow cellulose.
Lessons learned?
If we had hired a professional crew to come in and spray all the areas and I wasn’t there myself watching the process, I might think this was the best stuff in the world. But having gone through the process of doing it ourselves, I would absolutely not use this much foam again. I’m so glad we decided against the ‘flash and batt’ approach. This stuff is nasty, and we can’t even recycle the containers. The instructions that come with the containers didn’t even mention using air breathing masks. We had to call the company to get a recommendation on the right type of mask to use. Get one that blocks organic compounds and make sure you have plenty of fresh air while working.
I knew the foam was not a green product, but I was willing to trade the hazards for the long term benefits of a more air-tight, super insulated envelope. Now I’ve changed my mind. A little foam in strategic spots is fine. But if I design another home like this I would go out of my way to find other solutions.
Just as I was putting the finishing touches on this post, the always timely GBA posted this article, “Waiting for EPA Action on Spray Foam Insulation”.
Categories
- Air sealing 13
- Appliances & Fixtures 4
- Art 3
- Award 4
- Bathroom 8
- Batteries 1
- Decor 5
- Design 10
- Electrical 5
- Energy Calculations 13
- Energy Monitors 4
- Farm 1
- Finance 1
- Flooring 3
- Foundation 9
- Framing 8
- Heating 9
- House 7
- Insulation 8
- Kitchen 6
- Landscaping 3
- Lessons Learned 1
- Performance 60
- Plumbing 10
- Porch 5
- Radon 1
- Rainwater catchment 3
- Research / study 1
- Roof 7
- Septic / Waste water 2
- Sheetrock 6
- Siding 9
- Site Work 22
- Smart home 1
- Solar 64
- Solar Obsessed 10
- Stairs 2
- Surveying 3
- Ventilation 8
- Weather 1
- Windows & Doors 14
- plug-in 3
Archive
- Jan 2021 1
- Dec 2020 2
- May 2020 1
- Jan 2020 1
- May 2019 1
- Jan 2019 3
- Sep 2018 2
- Aug 2018 2
- Jan 2018 1
- Oct 2017 2
- Apr 2017 1
- Jan 2017 1
- Oct 2016 2
- Aug 2016 1
- Apr 2016 2
- Jan 2016 2
- Nov 2015 2
- Oct 2015 1
- Jul 2015 1
- May 2015 1
- Apr 2015 1
- Jan 2015 1
- Dec 2014 1
- Nov 2014 2
- Oct 2014 4
- Sep 2014 2
- Aug 2014 1
- Jul 2014 1
- Mar 2014 3
- Feb 2014 2
- Jan 2014 2
- Nov 2013 1
- Oct 2013 1
- Sep 2013 1
- Jul 2013 3
- Apr 2013 3
- Jan 2013 3
- Dec 2012 2
- Nov 2012 3
- Oct 2012 1
- Sep 2012 3
- Aug 2012 3
- Jul 2012 2
- Jun 2012 1
- May 2012 3
- Apr 2012 2
- Mar 2012 4
- Feb 2012 4
- Jan 2012 5
- Dec 2011 4
- Nov 2011 9
- Oct 2011 10
- Sep 2011 9
- Aug 2011 6
- Jul 2011 6
- Jun 2011 12
- May 2011 8
- Apr 2011 4
- Mar 2011 5
- Jan 2011 6
- Dec 2010 9
- Nov 2010 3
- Oct 2010 4
- Sep 2010 6
- Aug 2010 8
- Jul 2010 6
- Jun 2010 3
- May 2010 3
- Apr 2010 1
- Mar 2010 3
- Feb 2010 3
- Dec 2009 1
- Jun 2009 1
- May 2009 1
- Feb 2009 1
- Dec 2008 1
- Nov 2008 1
- Jun 2008 1