
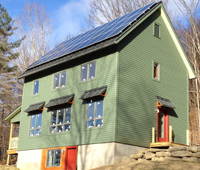
Window framing and insulating detail

This is the story of how we ended up with our window box detail.
We decided early on to use advanced framing techniques and work on a 24” module. In early drafts of the design I used window widths that fit between studs. The advantage to this approach is that you use less wood, smaller headers and fewer jack studs. Less wood means a bit less money spent on framing materials and fewer opportunities for thermal bridging and cold spots around openings in the envelope.
Sounds great in theory, but then I discovered how difficult it is to fit windows into a 24” module in a small house. Aesthetically we wanted the windows to line up with doorways and the spaces inside and frame the view, and also make use of passive solar. Eventually I gave up on fitting narrow windows into the structural grid.
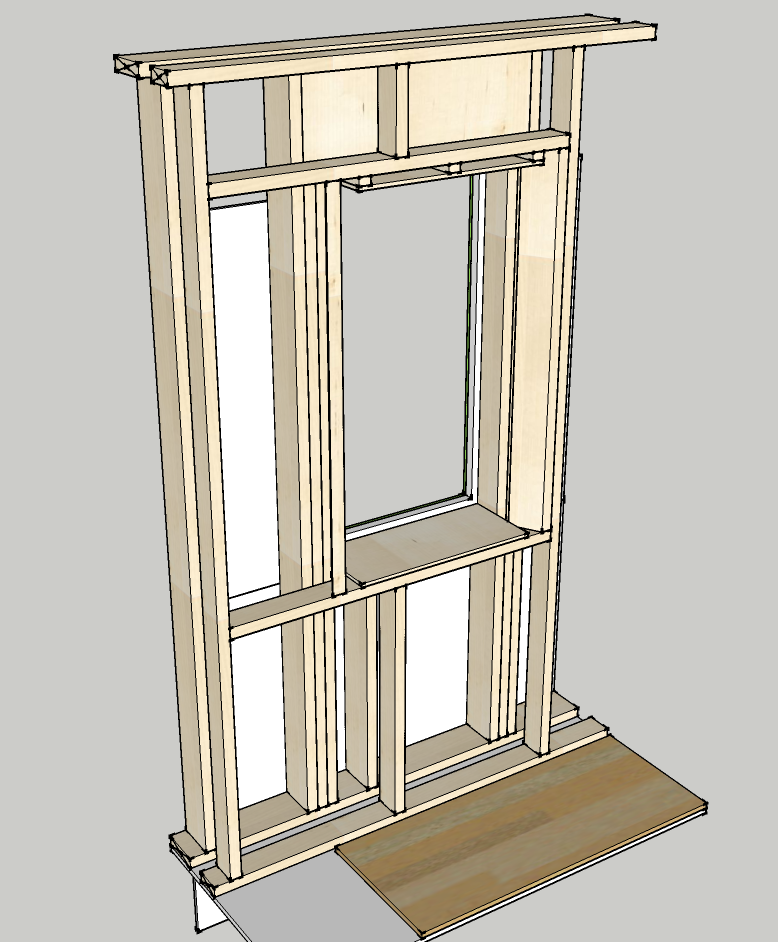
The tradeoff was that almost every window interrupted the path of the load, so the headers above the windows had to be beefed up and more jack studs were required. Adding more structure around the window opening means more bridging from the outside to the inside of the window box, short-circuiting the insulating value of the double-wall construction.
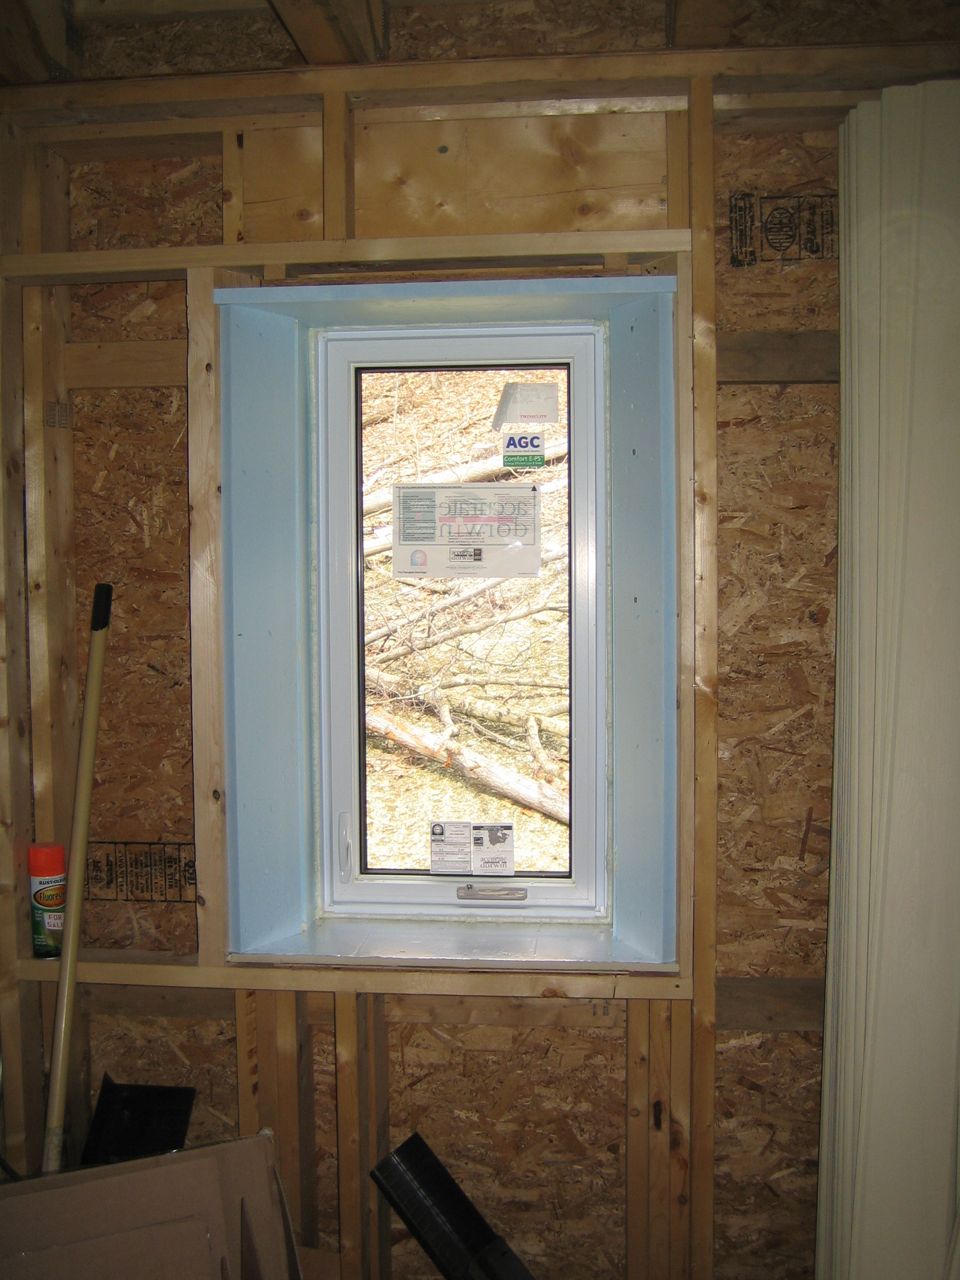
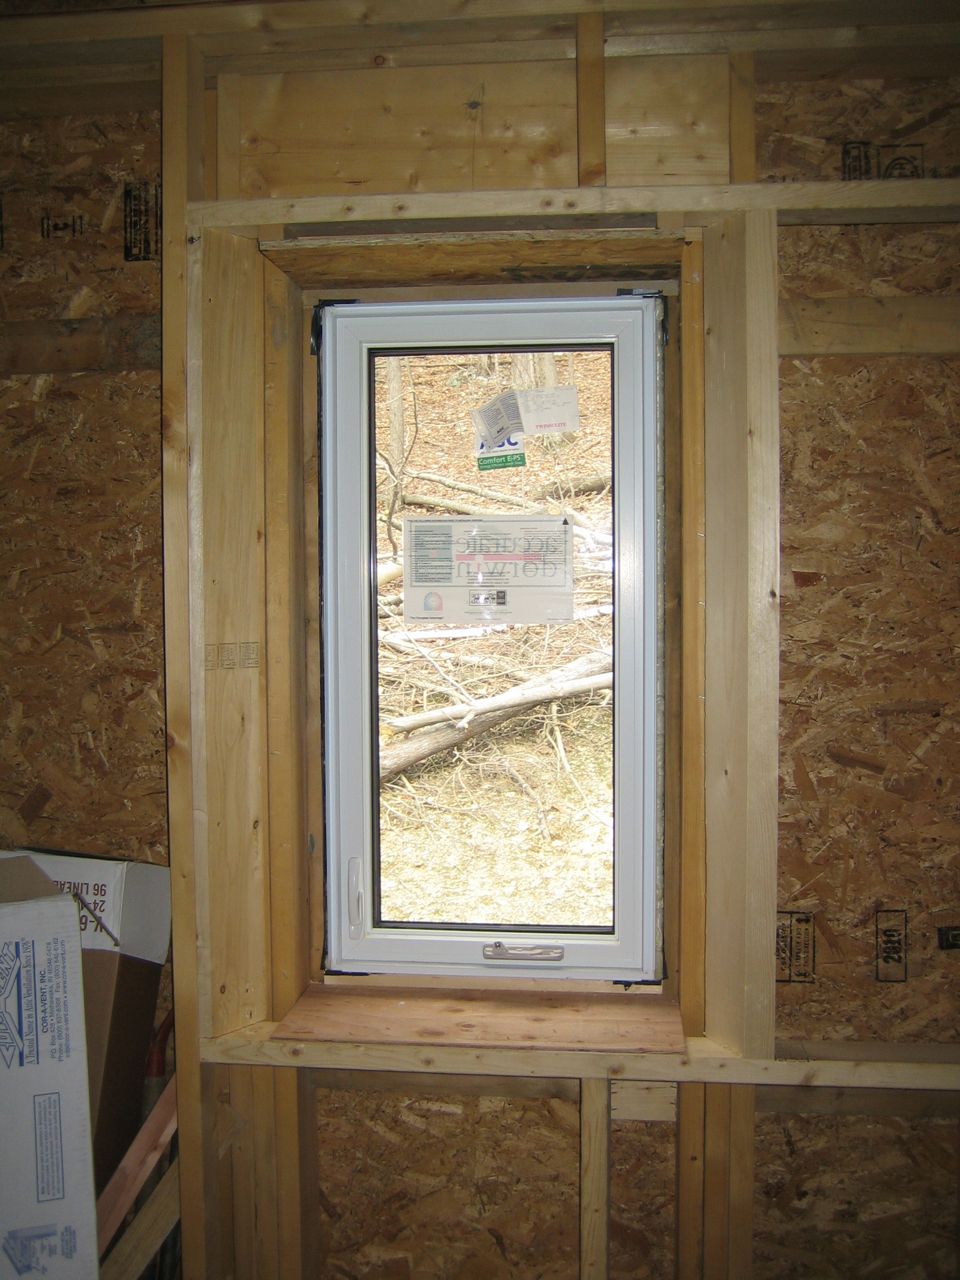
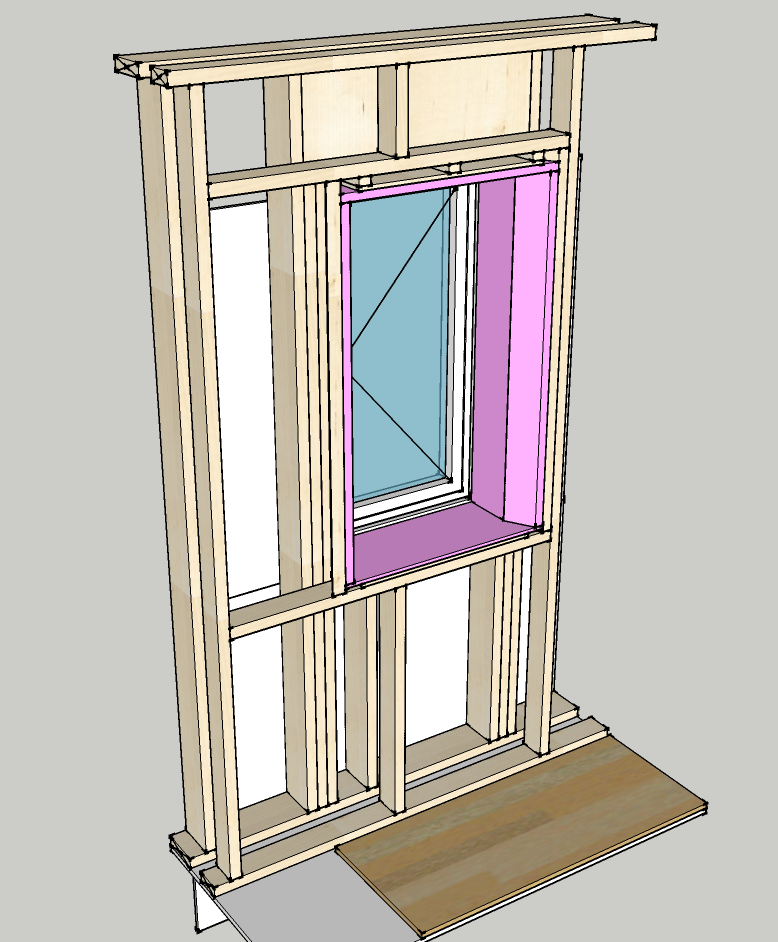
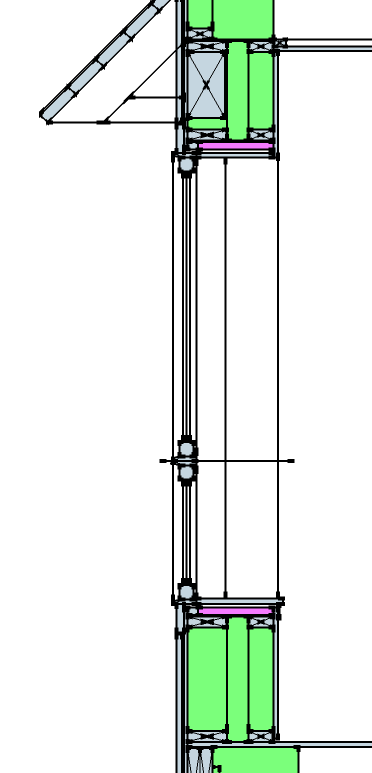
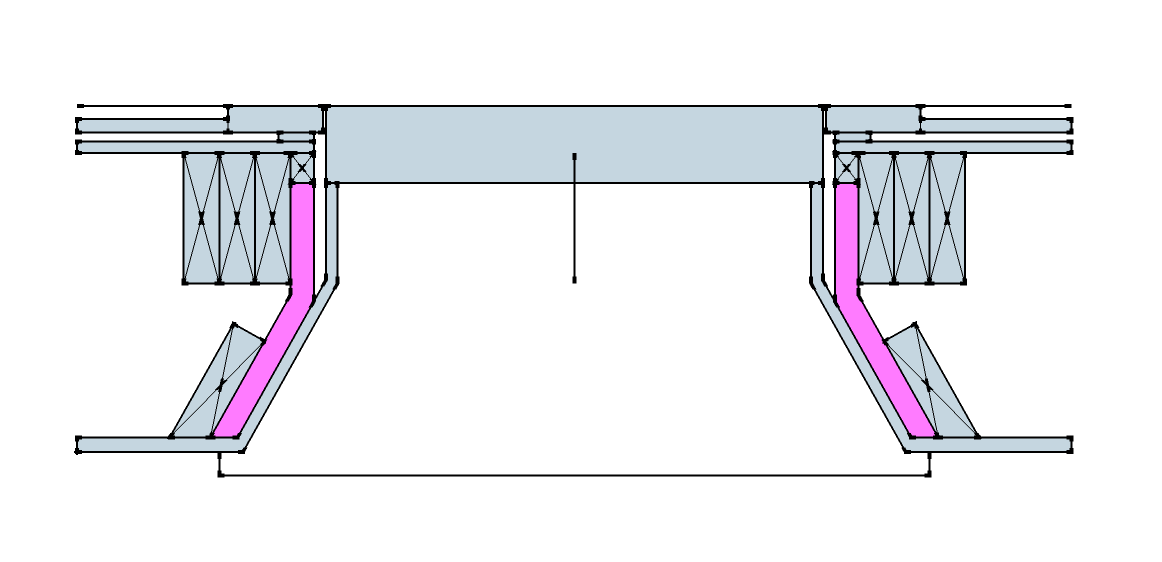
We also decided to use a rainscreen detail on the outside of the wall (see Final Energy Analysis and Recommendations), which pushes the 3 1/4” thick window frames out a bit, leaving a deeper window box inside. This exposes 4 1/4” of exterior structure (2x6’s, 1 king stud and 2 jack studs) around the window frame. Doing the math, 4.25” x 1.25 R/inch = 5.3 R, which is not a lot compared to the 40 R of the double stud wall.
Even though there are 12 window openings in the 2 bearing walls (north and south facing) it is only a small amount of bridging. Doing the math again, we have roughly 863 sf of interior walled surface area on the north and south walls, and 29.5 sf of bridging area next to the windows. That is roughly 3.5% of the overall interior wall surface.
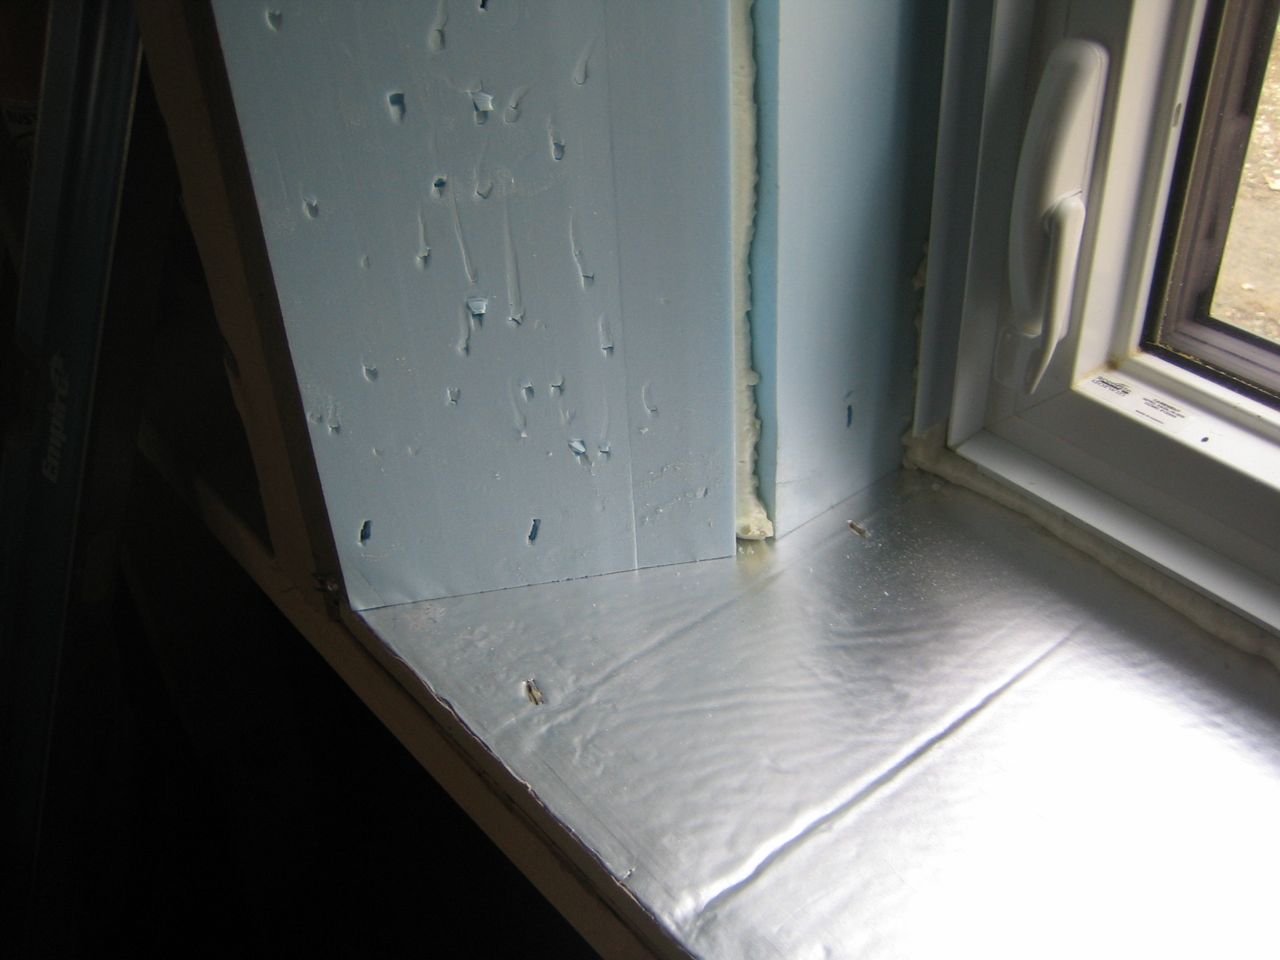
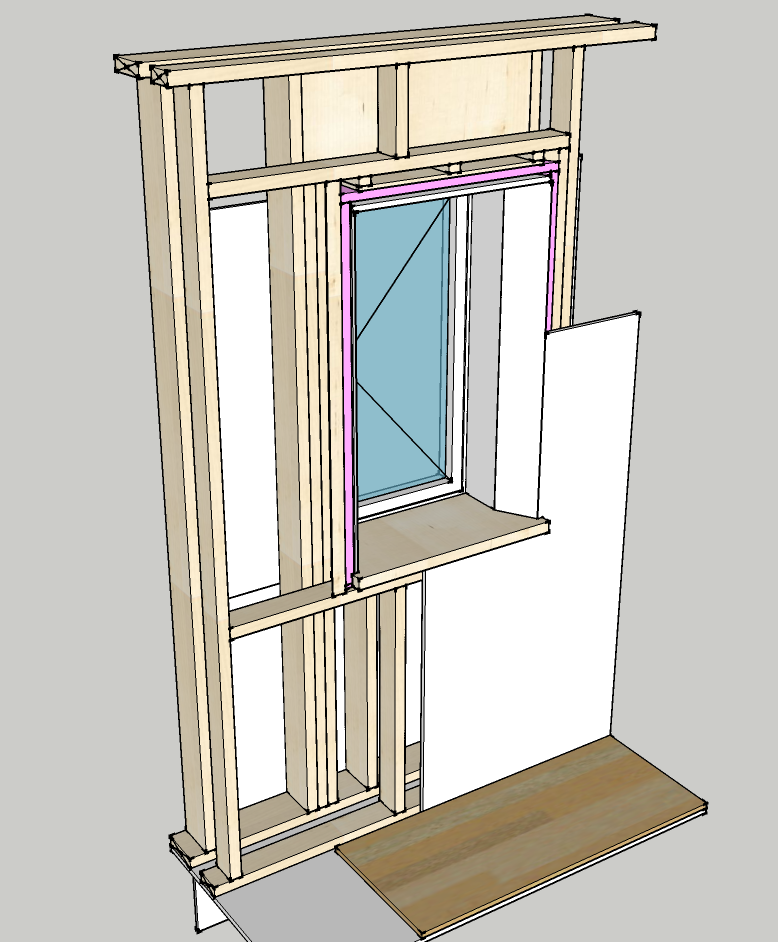
Our contractor, Warren, came up with several good ideas to minimize the cold spots created by the bridging. First, move the header up to the top plate to add some space and insulation between the header and the top of the window frame. Second, add a layer of 1” rigid insulation around the inside of the window box, to which the drywall will be attached. This layer of insulation is small (R5) but it doubles the R-value at these locations and breaks the bridge between the outer structural wall and the interior window box.
Earlier this week Warren added the bevel framing and insulation for one window. It goes together quite well, but in hindsight I would have just insulated the problem areas, the 2 sides of the window next to the studs, rather than the entire window box.
This weekend we are working on the remaining windows. Luckily the sun is out this weekend which makes working in the house fairly easy even when the temps outside are still below freezing. The passive solar is already working!
Categories
- Air sealing 13
- Appliances & Fixtures 4
- Art 3
- Award 4
- Bathroom 8
- Batteries 1
- Decor 5
- Design 10
- Electrical 5
- Energy Calculations 13
- Energy Monitors 4
- Farm 1
- Finance 1
- Flooring 3
- Foundation 9
- Framing 8
- Heating 9
- House 7
- Insulation 8
- Kitchen 6
- Landscaping 3
- Lessons Learned 1
- Performance 60
- Plumbing 10
- Porch 5
- Radon 1
- Rainwater catchment 3
- Research / study 1
- Roof 7
- Septic / Waste water 2
- Sheetrock 6
- Siding 9
- Site Work 22
- Smart home 1
- Solar 64
- Solar Obsessed 10
- Stairs 2
- Surveying 3
- Ventilation 8
- Weather 1
- Windows & Doors 14
- plug-in 3
Archive
- Jan 2021 1
- Dec 2020 2
- May 2020 1
- Jan 2020 1
- May 2019 1
- Jan 2019 3
- Sep 2018 2
- Aug 2018 2
- Jan 2018 1
- Oct 2017 2
- Apr 2017 1
- Jan 2017 1
- Oct 2016 2
- Aug 2016 1
- Apr 2016 2
- Jan 2016 2
- Nov 2015 2
- Oct 2015 1
- Jul 2015 1
- May 2015 1
- Apr 2015 1
- Jan 2015 1
- Dec 2014 1
- Nov 2014 2
- Oct 2014 4
- Sep 2014 2
- Aug 2014 1
- Jul 2014 1
- Mar 2014 3
- Feb 2014 2
- Jan 2014 2
- Nov 2013 1
- Oct 2013 1
- Sep 2013 1
- Jul 2013 3
- Apr 2013 3
- Jan 2013 3
- Dec 2012 2
- Nov 2012 3
- Oct 2012 1
- Sep 2012 3
- Aug 2012 3
- Jul 2012 2
- Jun 2012 1
- May 2012 3
- Apr 2012 2
- Mar 2012 4
- Feb 2012 4
- Jan 2012 5
- Dec 2011 4
- Nov 2011 9
- Oct 2011 10
- Sep 2011 9
- Aug 2011 6
- Jul 2011 6
- Jun 2011 12
- May 2011 8
- Apr 2011 4
- Mar 2011 5
- Jan 2011 6
- Dec 2010 9
- Nov 2010 3
- Oct 2010 4
- Sep 2010 6
- Aug 2010 8
- Jul 2010 6
- Jun 2010 3
- May 2010 3
- Apr 2010 1
- Mar 2010 3
- Feb 2010 3
- Dec 2009 1
- Jun 2009 1
- May 2009 1
- Feb 2009 1
- Dec 2008 1
- Nov 2008 1
- Jun 2008 1