
Siding progress
The weather report appeared to be clear for a few days in row last week so we decided it was time to start the siding. The first day was half sunny and half stormy with a brief spat of hail. This was the same storm that spawned tornadoes in Massachusetts. Despite this initial setback, we were able to work steadily the last few days.
We looked at a few different siding materials when we started the project. Affordability was a big factor, but so was sustainability and durability. Cedar is the most durable natural product but also very expensive. We rejected fiber cement because we just didn’t like the look and it seemed out of place in our woodsy setting. Vinyl looks cheap and it is certainly not an environmentally friendly product.
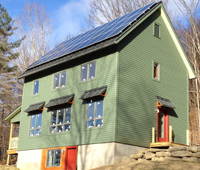
We settled on hemlock wood siding. It is durable, looks good and is cheaper than cedar. It is factory stained with one coat of Cabot’s (Thicket solid) water-soluble stain.
We are installing the siding over 3/8” Sturdi-Strips furring and 7/16” screened Cor-a-Vents at the top and bottom of the wall and above windows and doors. This provides a space behind the siding for air to circulate and aid in the drying process. We’re using this rain screen approach because the ZIP panels are OSB and we have 12” of cellulose next to it. OSB and cellulose perform best if they can dry easily. We want to make sure they can dry as easily as possible.
We’re using metal flashing at any location water has a direct path to the wall, anytime siding meets trim, frieze or baseboard and between lengths of siding. All siding and trim is attached with stainless nails.
Here’s some snapshots with descriptions of the details.

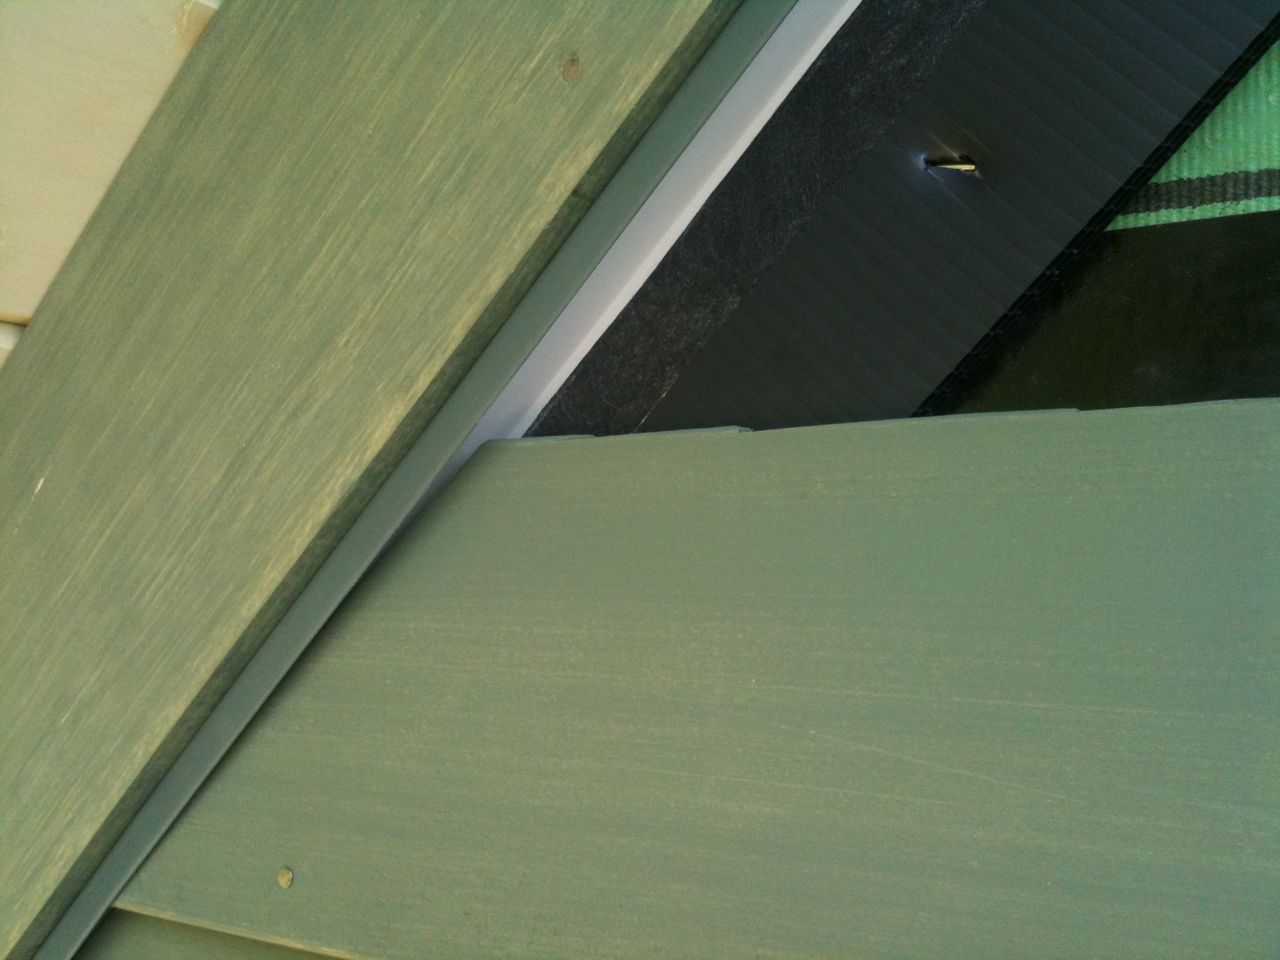
We wrapped the window with furring strips then nailed flashing on the outside edges on top of the furring. Window trim was then installed over furring and flashing. Drip cap on top was taped to sheathing using Zip tape. Cor-a-Vent was nailed over drip cap, then the siding was notched 3/8” over the drip cap to allow for drainage and air flow.
Frieze plate is nailed over furring. We forgot to notch the frieze trim plate before we nailed the furring and frieze, so we custom folded a J-channel below it. This detail prevents insects from getting under the frieze and shields rain from directly entering the gap. We then nailed Cor-a-Vent strips over the bottom edge of the J-channel, then slid the siding into the channel, with a 1/4” gap at the gable edge for air circulation. We’ll notch the frieze plate for the other gable end so we don’t have to use the J-channel flashing detail.
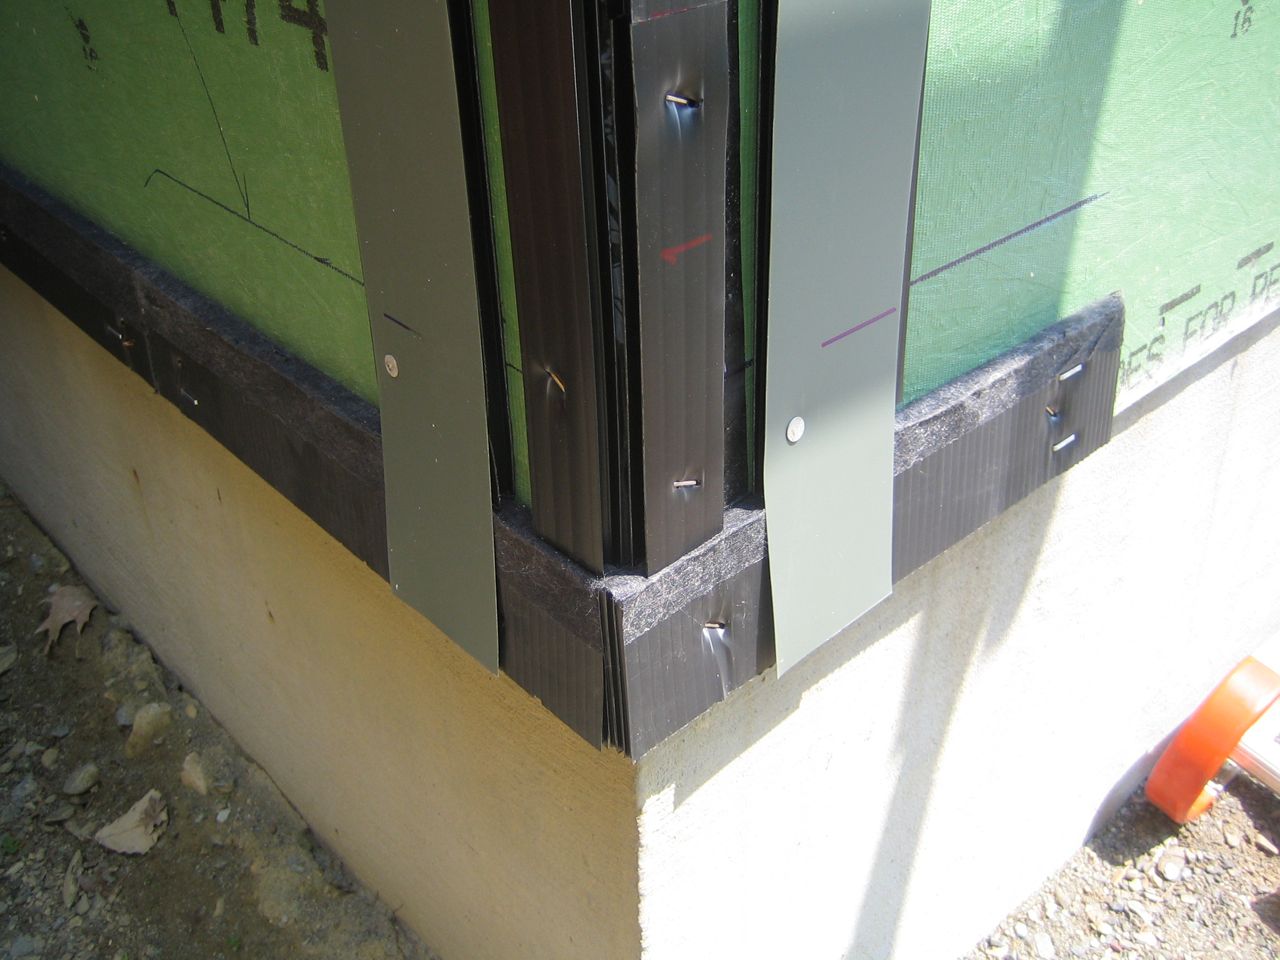
Two strips of furring at the edge, and two more offset from the edge to support nailing of the corner trim, then flashing over the furring. Screened Cor-a-Vent at the bottom for air circulation. Corner trim is nailed over this, then base trim is nailed over the Cor-a-Vent.
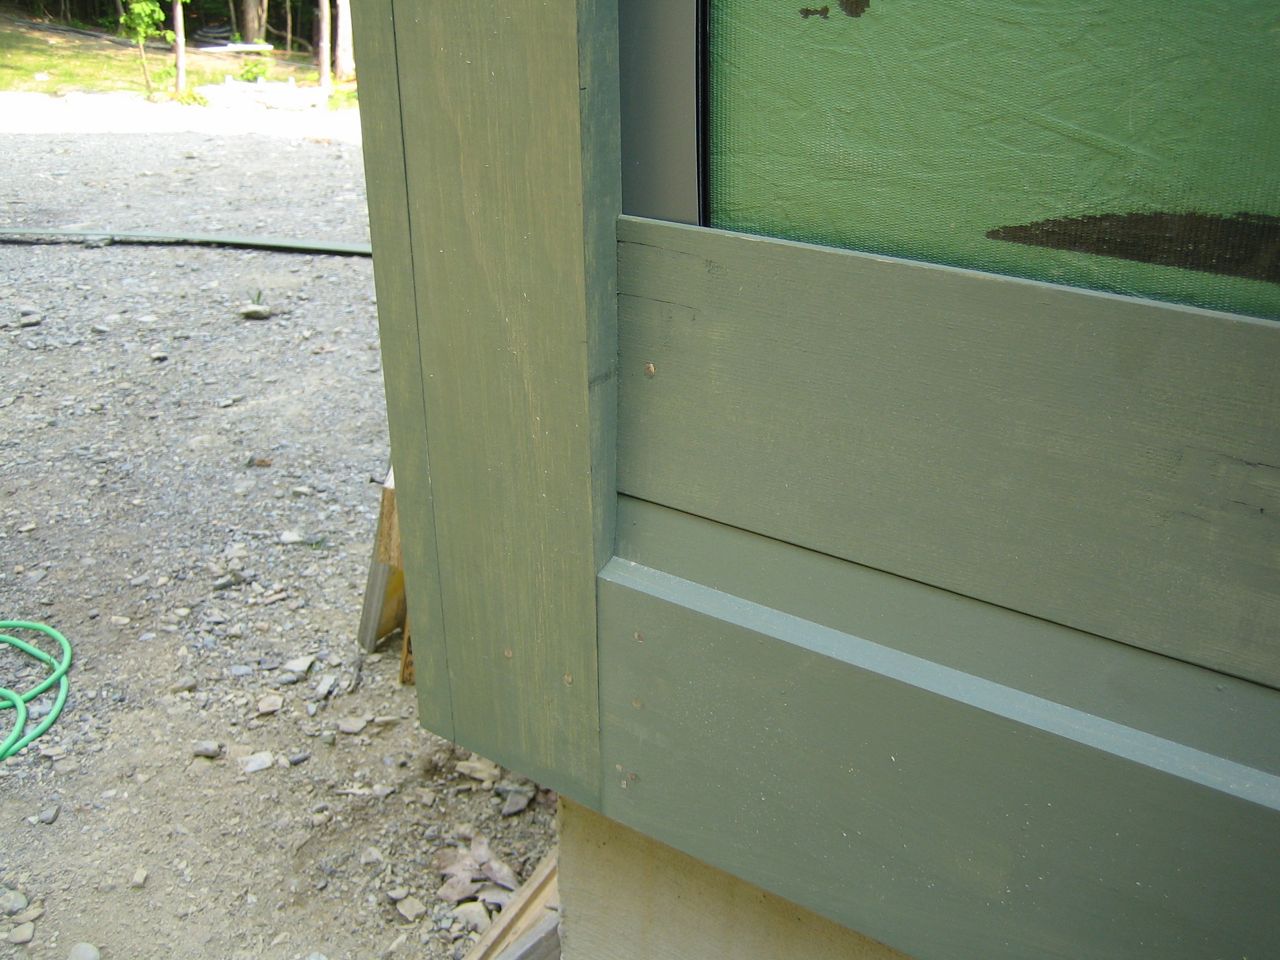
You can see the flashing behind the corner trim. The base and corner trim extends about a 1/2” below the bottom of the sheathing. The base trim is notched to accept the fist layer of siding. The layer of siding above the base will be hidden by the first two courses of siding.
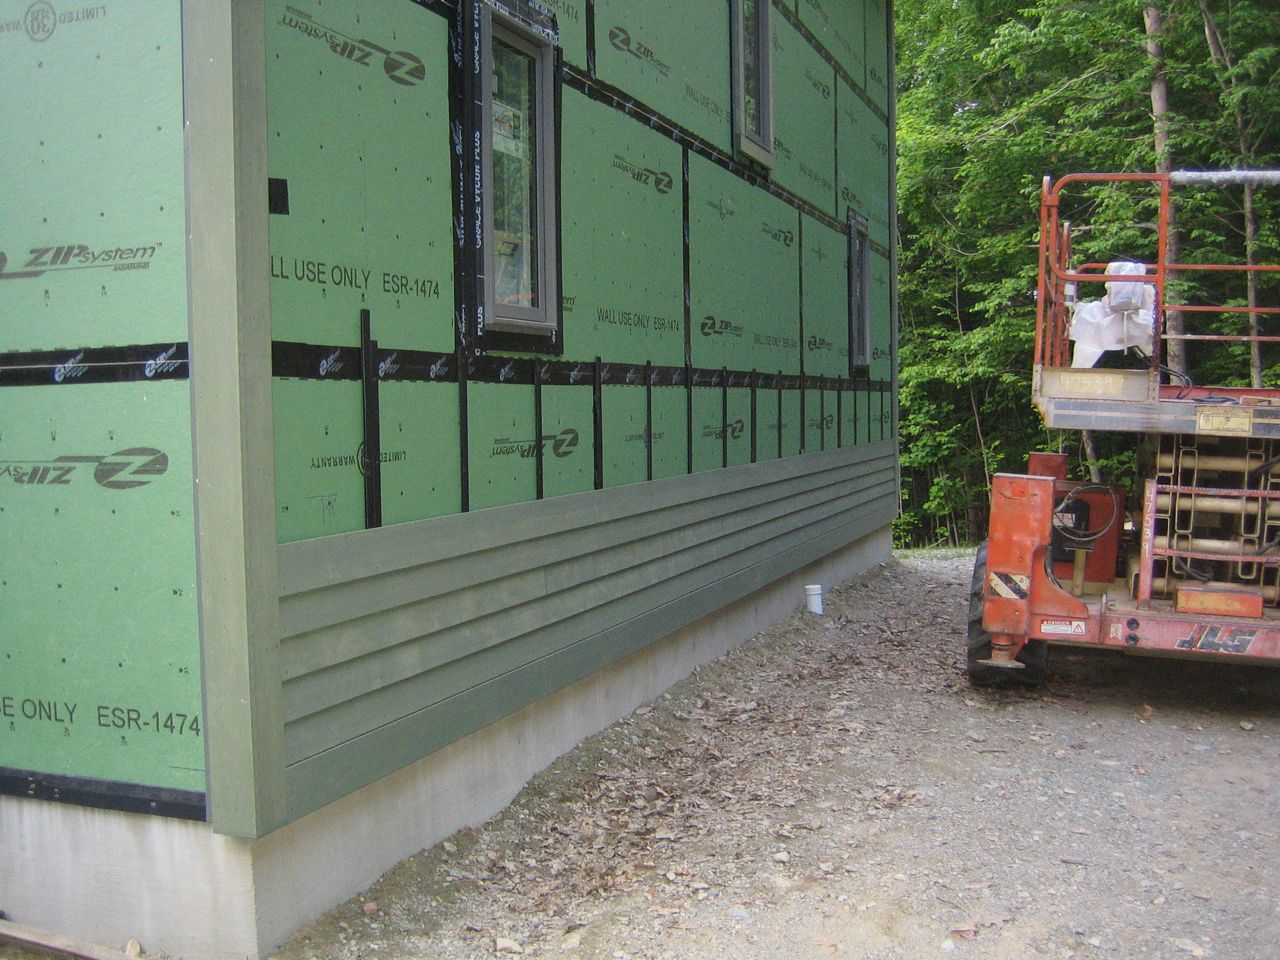
The first 5 courses of siding up on the north side of the house. You can see the vertical furring strips spaced at 24” on center. We’ll pause here until the ventilation ducts are installed 4 feet above finish grade. Then we’ll continue the siding around the vent in/out-takes. The outdoor unit of the ASHP will also be installed on this wall with brackets. Then we’ll figure out how to install the siding around the brackets.
Categories
- Air sealing 13
- Appliances & Fixtures 4
- Art 3
- Award 4
- Bathroom 8
- Batteries 1
- Decor 5
- Design 10
- Electrical 5
- Energy Calculations 13
- Energy Monitors 4
- Farm 1
- Finance 1
- Flooring 3
- Foundation 9
- Framing 8
- Heating 9
- House 7
- Insulation 8
- Kitchen 6
- Landscaping 3
- Lessons Learned 1
- Performance 60
- Plumbing 10
- Porch 5
- Radon 1
- Rainwater catchment 3
- Research / study 1
- Roof 7
- Septic / Waste water 2
- Sheetrock 6
- Siding 9
- Site Work 22
- Smart home 1
- Solar 64
- Solar Obsessed 10
- Stairs 2
- Surveying 3
- Ventilation 8
- Weather 1
- Windows & Doors 14
- plug-in 3
Archive
- Jan 2021 1
- Dec 2020 2
- May 2020 1
- Jan 2020 1
- May 2019 1
- Jan 2019 3
- Sep 2018 2
- Aug 2018 2
- Jan 2018 1
- Oct 2017 2
- Apr 2017 1
- Jan 2017 1
- Oct 2016 2
- Aug 2016 1
- Apr 2016 2
- Jan 2016 2
- Nov 2015 2
- Oct 2015 1
- Jul 2015 1
- May 2015 1
- Apr 2015 1
- Jan 2015 1
- Dec 2014 1
- Nov 2014 2
- Oct 2014 4
- Sep 2014 2
- Aug 2014 1
- Jul 2014 1
- Mar 2014 3
- Feb 2014 2
- Jan 2014 2
- Nov 2013 1
- Oct 2013 1
- Sep 2013 1
- Jul 2013 3
- Apr 2013 3
- Jan 2013 3
- Dec 2012 2
- Nov 2012 3
- Oct 2012 1
- Sep 2012 3
- Aug 2012 3
- Jul 2012 2
- Jun 2012 1
- May 2012 3
- Apr 2012 2
- Mar 2012 4
- Feb 2012 4
- Jan 2012 5
- Dec 2011 4
- Nov 2011 9
- Oct 2011 10
- Sep 2011 9
- Aug 2011 6
- Jul 2011 6
- Jun 2011 12
- May 2011 8
- Apr 2011 4
- Mar 2011 5
- Jan 2011 6
- Dec 2010 9
- Nov 2010 3
- Oct 2010 4
- Sep 2010 6
- Aug 2010 8
- Jul 2010 6
- Jun 2010 3
- May 2010 3
- Apr 2010 1
- Mar 2010 3
- Feb 2010 3
- Dec 2009 1
- Jun 2009 1
- May 2009 1
- Feb 2009 1
- Dec 2008 1
- Nov 2008 1
- Jun 2008 1