Air source heat pump installed, part 1

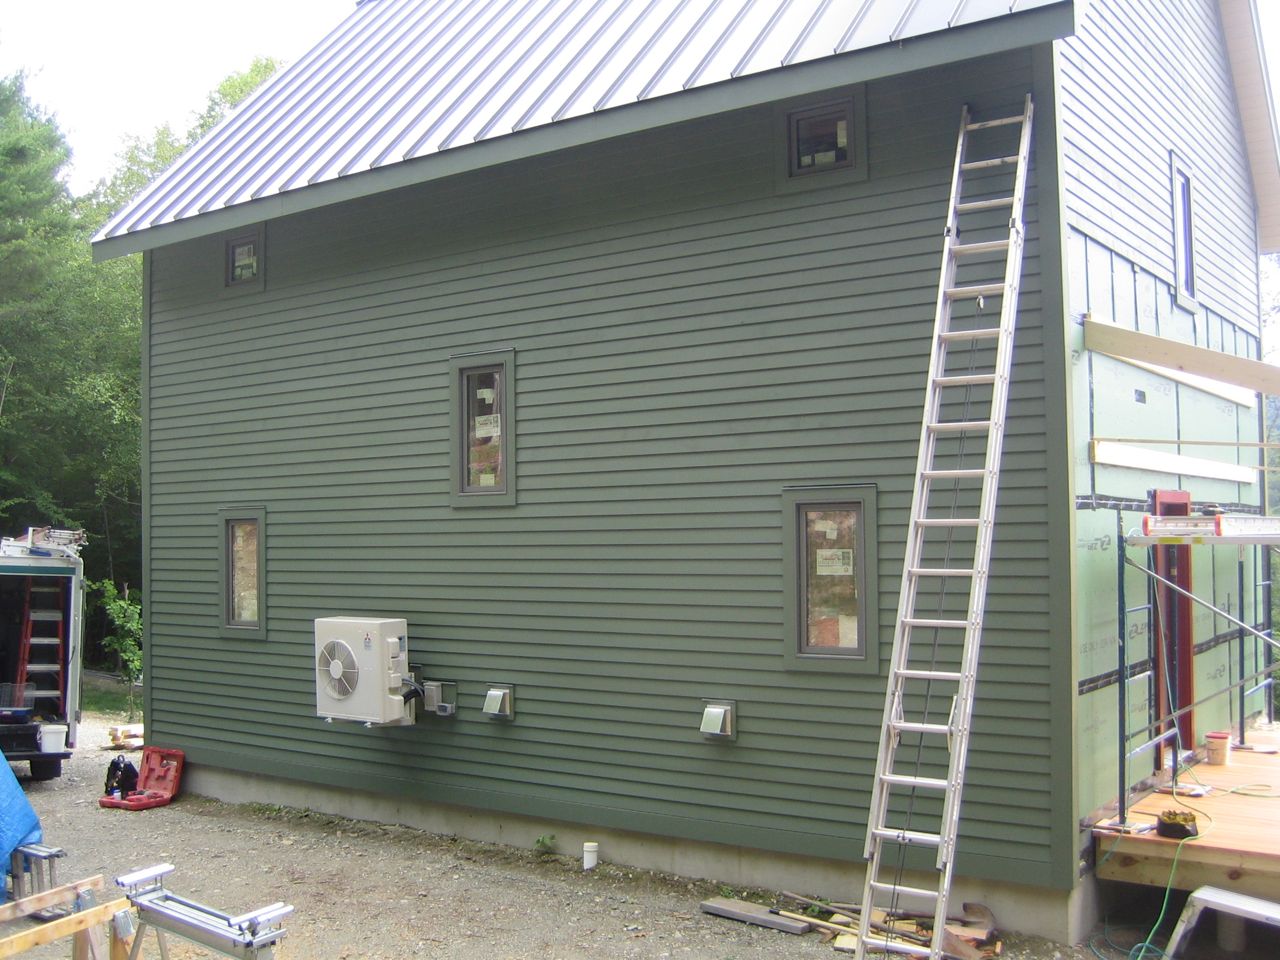
Yesterday our heating contractor installed the exterior unit of the air source heat pump (ASHP) system. Our system is part of the Mitsubishi Mr. Slim product line. It is referred to as a mini-split system, because the compressor and the air blower are two separate units. The compressor sits outside the house envelope and the air blower indoors. They are connected by a small refrigerant tube.
Our particular model, the MUZ-FE18NA is rated to produce a maximum of 21,600 btu/hr at an outdoor temperature of 5° F. Our maximum heating load was calculated to be 12,200 btu/hr, so we have some wiggle room. Typically these units are sized to meet the maximum load at the minimum expected temperature. This unit will continue to operate at -13° F. When temperatures reach well below that level, the electric resistance heat kicks in as a backup if needed.
What’s amazing about these units is that they are incredibly efficient for their cost. The efficiency at which a system converts electricity to heat is called the Coefficient of Performance (COP). Electric resistance has a COP of 1. Meaning if you put in 100 watts of electricity, you get 100 watts of heat. Our ASHP operates at a COP of 4.11 at an outdoor temperature of 47° F and an indoor temperature of 70° F. That means it is 4.11 times more efficient than electric resistance. We put in 100 watts of electricity and we get 411 watts of heat. Pretty cool! Err, I mean hot.
The COP changes as the temperature outside goes down and the temperature inside goes up. At 17° F, the COP drops to 2.77. That’s why ground source heat pumps (GSHP) are much more efficient, typically 3-6 COP at low temperatures. Ground temperatures are much warmer than air temperatures in the winter months. But GSHP’s can cost a lot more than ASHP’s. Our ASHP, including installation will cost less than $5,000. I’m guessing a GSHP would cost at least double that, and possibly more due to the drilling required.
Apparently our setup is a little different than most. Typically the indoor unit is installed on an exterior wall, so it’s easy to run the refrigerant pipe directly out the wall where it can then snake around the house to the external unit. Our unit is installed on an interior wall. Phil had to run the pipe through the interior wall down to the first stair landing then out. You can snake the tubing around the outside or the inside but not both, or at least not easily. This is one of the reasons why the external unit is placed where it it. It allows the tubing to exit the wall and go directly into the unit.
The last component is the drain. When running the unit in cooling mode, just like an air-conditioner, moisture in air will condense on the coils of the interior unit. Typically the condensate is drained to the outdoors near the outdoor unit. But I was concerned this would provide a air leakage point, so we’re draining the unit into the clothes washer and dryer drain, which is near the interior unit. This required ordering a condensate pump to ensure we get proper drainage.
We won’t be ready to install the inside unit (part 2) until we have sheet rocked the first floor. In the meantime, back to the porch framing and siding.
Categories
- Air sealing 13
- Appliances & Fixtures 4
- Art 3
- Award 4
- Bathroom 8
- Batteries 1
- Decor 5
- Design 10
- Electrical 5
- Energy Calculations 13
- Energy Monitors 4
- Farm 1
- Finance 1
- Flooring 3
- Foundation 9
- Framing 8
- Heating 9
- House 7
- Insulation 8
- Kitchen 6
- Landscaping 3
- Lessons Learned 1
- Performance 60
- Plumbing 10
- Porch 5
- Radon 1
- Rainwater catchment 3
- Research / study 1
- Roof 7
- Septic / Waste water 2
- Sheetrock 6
- Siding 9
- Site Work 22
- Smart home 1
- Solar 64
- Solar Obsessed 10
- Stairs 2
- Surveying 3
- Ventilation 8
- Weather 1
- Windows & Doors 14
- plug-in 3
Archive
- Jan 2021 1
- Dec 2020 2
- May 2020 1
- Jan 2020 1
- May 2019 1
- Jan 2019 3
- Sep 2018 2
- Aug 2018 2
- Jan 2018 1
- Oct 2017 2
- Apr 2017 1
- Jan 2017 1
- Oct 2016 2
- Aug 2016 1
- Apr 2016 2
- Jan 2016 2
- Nov 2015 2
- Oct 2015 1
- Jul 2015 1
- May 2015 1
- Apr 2015 1
- Jan 2015 1
- Dec 2014 1
- Nov 2014 2
- Oct 2014 4
- Sep 2014 2
- Aug 2014 1
- Jul 2014 1
- Mar 2014 3
- Feb 2014 2
- Jan 2014 2
- Nov 2013 1
- Oct 2013 1
- Sep 2013 1
- Jul 2013 3
- Apr 2013 3
- Jan 2013 3
- Dec 2012 2
- Nov 2012 3
- Oct 2012 1
- Sep 2012 3
- Aug 2012 3
- Jul 2012 2
- Jun 2012 1
- May 2012 3
- Apr 2012 2
- Mar 2012 4
- Feb 2012 4
- Jan 2012 5
- Dec 2011 4
- Nov 2011 9
- Oct 2011 10
- Sep 2011 9
- Aug 2011 6
- Jul 2011 6
- Jun 2011 12
- May 2011 8
- Apr 2011 4
- Mar 2011 5
- Jan 2011 6
- Dec 2010 9
- Nov 2010 3
- Oct 2010 4
- Sep 2010 6
- Aug 2010 8
- Jul 2010 6
- Jun 2010 3
- May 2010 3
- Apr 2010 1
- Mar 2010 3
- Feb 2010 3
- Dec 2009 1
- Jun 2009 1
- May 2009 1
- Feb 2009 1
- Dec 2008 1
- Nov 2008 1
- Jun 2008 1