
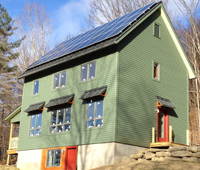
Rainwater catchment system completed

Last year when we had the foundation excavated, we bought a 1000 gallon cistern and buried it under the future porch. It was so long ago and so well hidden that I almost forgot about it. But a few months ago I realized that this would require a bit of research to put together a simple working system that looked like it was designed to integrate with the house rather than tacked on later.
Let’s take a look at the components of our planned rain water system.
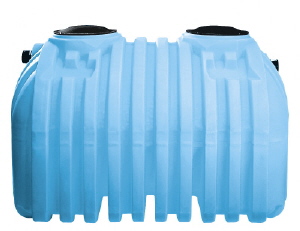
1) The Tank. We have a 1,000 gallon Bruiser. It has an inlet at the top, an outlet near the bottom and an overflow just below the inlet.
2) Gutters and downspouts. 6” half round painted aluminum, connected to 4” round downspouts. One on the front of the house, one on the back. There’s also a gutter on the porch but it will not drain into the cistern at this time.
3) Downspout filter. When I started thinking about how to connect the downspouts to the cistern I knew the hard part was to find a way to filter the leaves and other stuff (dead bugs and bird pooh) out, without bolting some large contraption to the side of the house. If you’ve spent any time looking around for downspout filters, there’s a lot of different solutions and products out there. Most are u-g-l-y.
The first product I found that was acceptable was the Downspout Filter from RainXchange. It appeared to do everything we needed. It’s buried so you don’t see any ugly attachments to the house, and it would filter the volume of water we expected from the roof.
However, I started thinking about how we’d actually route the downspouts to the filter. Because of the slope on the side of the house, I realized we really needed a filter that we could connect directly to the downspouts and have all connections underground. The filter from RainXchange was made to be buried under the downspout discharge. I’d need to find a way to route 2 downspouts to discharge above the filter. Or buy two and position one at each downspout, but because of the slope this wouldn’t work for the front gutter.
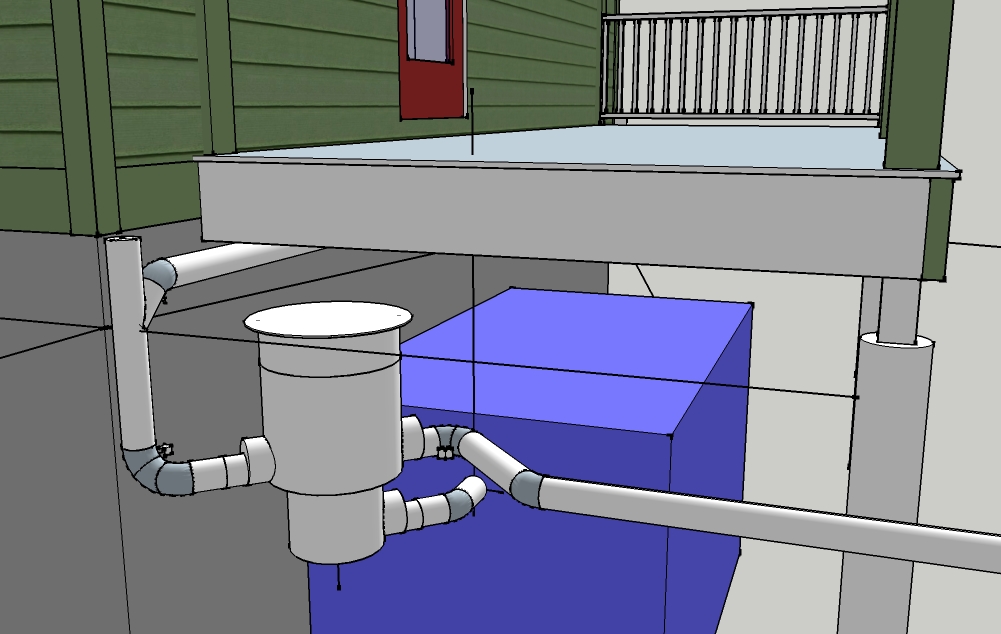
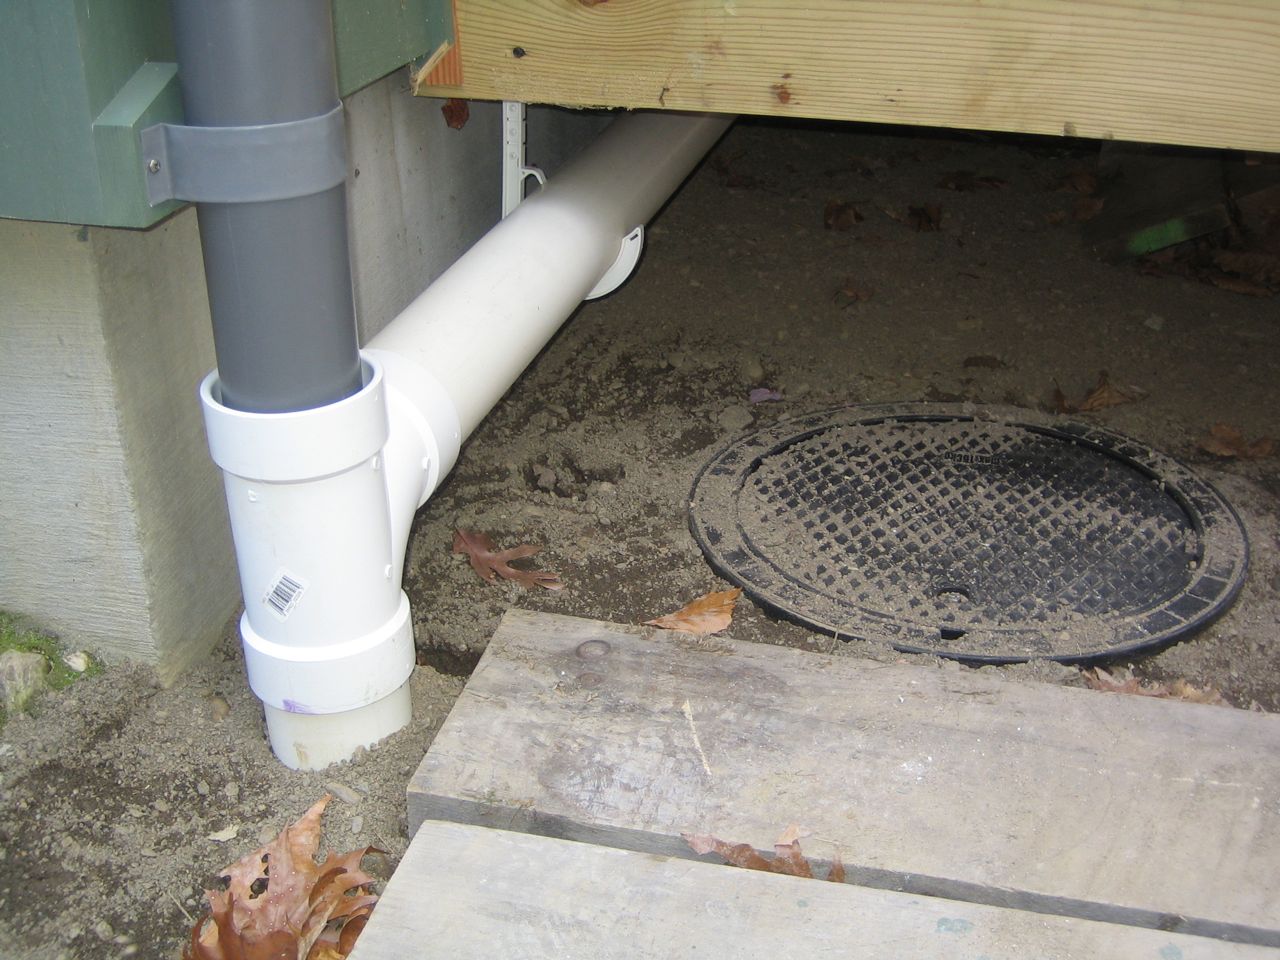
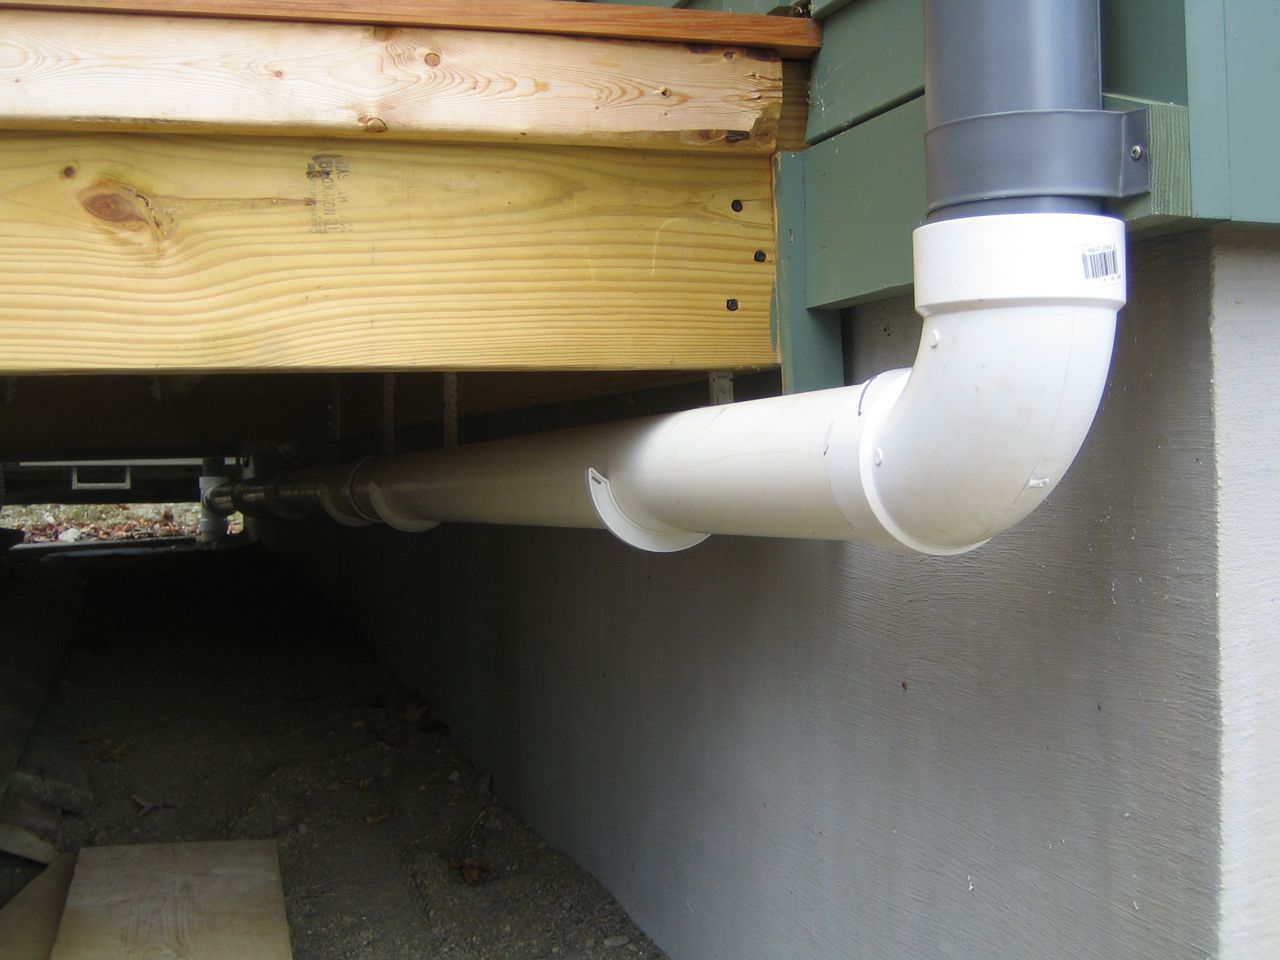
Shortly thereafter I found the Small Basket Filter from ConservationTechnology. They were recommended by my contractor. They unfortunately never came up on any web search for rain filters, but they had exactly what we needed. A simple filter, easily accessible from above and all connections buried. There is one inlet and an overflow at the same level. The outlet from the filter is at the bottom which connects to the cistern. The overflow is plumbed to daylight, downslope and away from the house. The lid top is adjustable in height making the depth of the filter variable. See SketchUp model view above for underground connections.
4) Connections. We originally planned to use aluminum downspout components to connect to the filter, but standard aluminum components are fairly restricted. 75 degree angles are the norm, anything else is custom. So we decided to connect the downspouts to the filter using standard PVC pipes and fittings. It won’t be pretty, but neither would the aluminum. The porch will hide most of it, and I’m confident we can find some other creative ways to hide the ugly stuff.
5) Plumbing. The cistern is plumbed to the basement so that if needed, we could add a pump. Then routed to the exterior. We’re not using frost-free sillcocks. They rely on the excess heat inside the envelope to warm the pipe, but because we have 12 inches of insulation, they would just freeze and leak into the wall. So we’re installing valves with a blowout hole so we can easily drain the pipes each winter.
Now we have a simple source of water for our future garden without pumps or the use of electricity.
Categories
- Air sealing 13
- Appliances & Fixtures 4
- Art 3
- Award 4
- Bathroom 8
- Batteries 1
- Decor 5
- Design 10
- Electrical 5
- Energy Calculations 13
- Energy Monitors 4
- Farm 1
- Finance 1
- Flooring 3
- Foundation 9
- Framing 8
- Heating 9
- House 7
- Insulation 8
- Kitchen 6
- Landscaping 3
- Lessons Learned 1
- Performance 60
- Plumbing 10
- Porch 5
- Radon 1
- Rainwater catchment 3
- Research / study 1
- Roof 7
- Septic / Waste water 2
- Sheetrock 6
- Siding 9
- Site Work 22
- Smart home 1
- Solar 64
- Solar Obsessed 10
- Stairs 2
- Surveying 3
- Ventilation 8
- Weather 1
- Windows & Doors 14
- plug-in 3
Archive
- Jan 2021 1
- Dec 2020 2
- May 2020 1
- Jan 2020 1
- May 2019 1
- Jan 2019 3
- Sep 2018 2
- Aug 2018 2
- Jan 2018 1
- Oct 2017 2
- Apr 2017 1
- Jan 2017 1
- Oct 2016 2
- Aug 2016 1
- Apr 2016 2
- Jan 2016 2
- Nov 2015 2
- Oct 2015 1
- Jul 2015 1
- May 2015 1
- Apr 2015 1
- Jan 2015 1
- Dec 2014 1
- Nov 2014 2
- Oct 2014 4
- Sep 2014 2
- Aug 2014 1
- Jul 2014 1
- Mar 2014 3
- Feb 2014 2
- Jan 2014 2
- Nov 2013 1
- Oct 2013 1
- Sep 2013 1
- Jul 2013 3
- Apr 2013 3
- Jan 2013 3
- Dec 2012 2
- Nov 2012 3
- Oct 2012 1
- Sep 2012 3
- Aug 2012 3
- Jul 2012 2
- Jun 2012 1
- May 2012 3
- Apr 2012 2
- Mar 2012 4
- Feb 2012 4
- Jan 2012 5
- Dec 2011 4
- Nov 2011 9
- Oct 2011 10
- Sep 2011 9
- Aug 2011 6
- Jul 2011 6
- Jun 2011 12
- May 2011 8
- Apr 2011 4
- Mar 2011 5
- Jan 2011 6
- Dec 2010 9
- Nov 2010 3
- Oct 2010 4
- Sep 2010 6
- Aug 2010 8
- Jul 2010 6
- Jun 2010 3
- May 2010 3
- Apr 2010 1
- Mar 2010 3
- Feb 2010 3
- Dec 2009 1
- Jun 2009 1
- May 2009 1
- Feb 2009 1
- Dec 2008 1
- Nov 2008 1
- Jun 2008 1