
Friend or Foam?

Many spray foam kits are targeted for the ‘do it yourself’ crowd, but if you do it yourself and you encounter problems, be prepared to remove bad foam.
The good news
Foam is great in spots where nothing else will work quite as well. We used foam primarily for air sealing in odd spots, but also for insulation value in areas where it was difficult to blow cellulose. See our previous post on this topic, “Foam continued…”.
The bad news
Foam can be fussy. Foam itself must be within a specified temperature range, the surface must be clean and within a specified temperature range, the hose and gun must be in perfect working order, and once you start spraying you can’t stop for more then a few seconds without gumming up the spray gun. In addition, you must provide adequate ventilation and wear protective clothing, breathing gear and goggles. Does this sound like a DIY project? I’m guessing most applications of spray foam are successful. We had used about 6 kits before we ran into problems, but sometimes things go wrong.
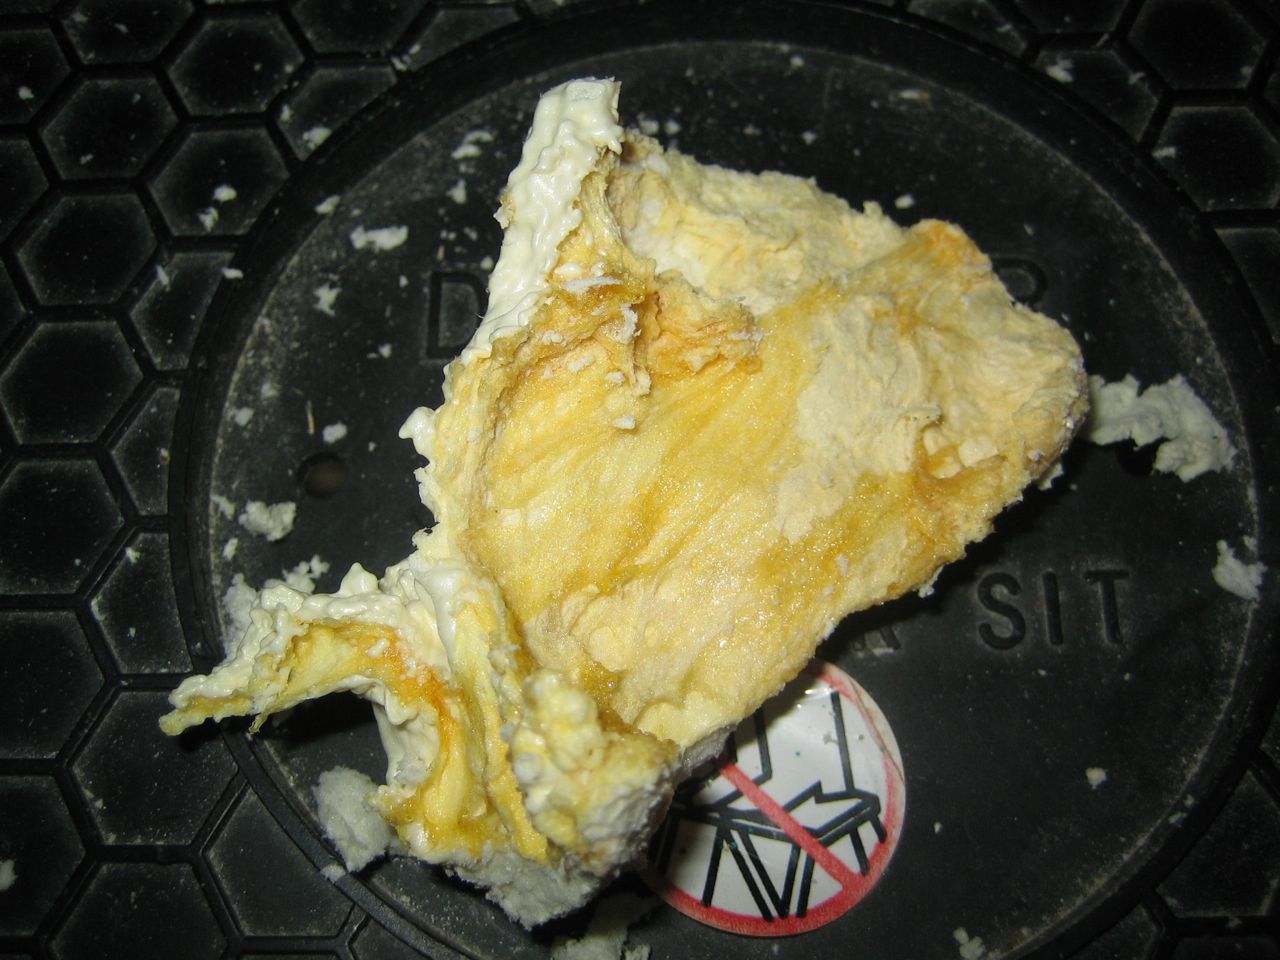
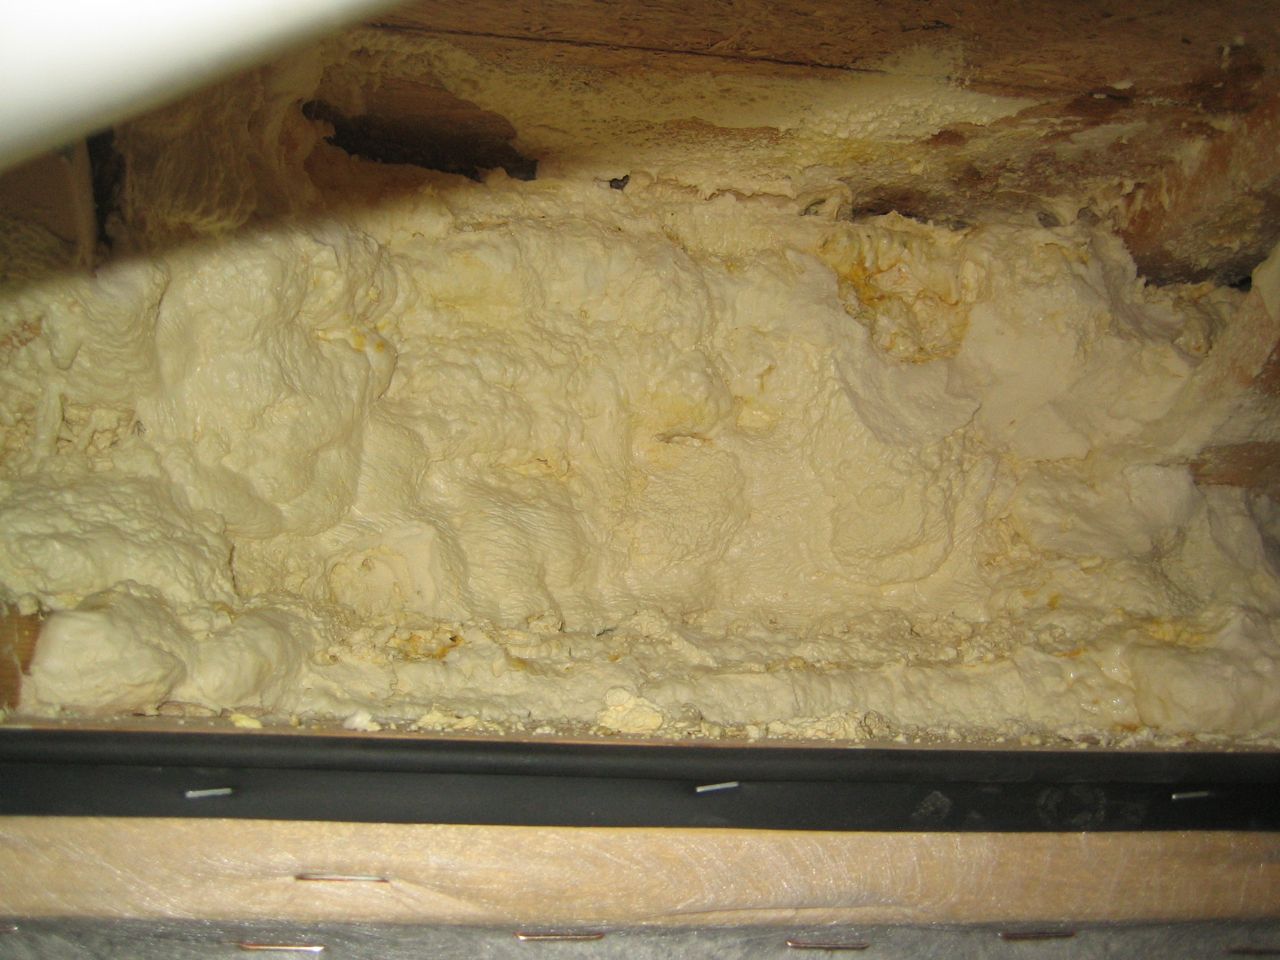
In our case, since we are not professional installers we were not immediately aware that something was going wrong. The foam did not appear to be expanding as usual or curing properly. It looked a little more yellow than white and felt rubbery when poked. By the time we realized something was not right, we had sprayed some 40 linear feet of band joist area in the basement. We’re still not sure what caused the problem. Was it a bum kit or bad hose and gun? We had followed all the same precautions as before, but we had very different results.
At first the manufacturer told us to just let it air out, it would cure on its own, it just might take longer than usual. So we vented and waited a month. All we had was a sticky smelly mess.
After several conversations with the manufacturer, we were faced with two options. A. Remove the bad foam. B. Spray over it with a (hopefully) good layer of foam to seal in the bad smelly stuff. We decided to remove the foam. For more background on why we chose to remove the foam, see Martin Holladay’s post on GreenBuildingAdvisor, “Spray Foam Jobs With Lingering Odor Problems”.
The ugly
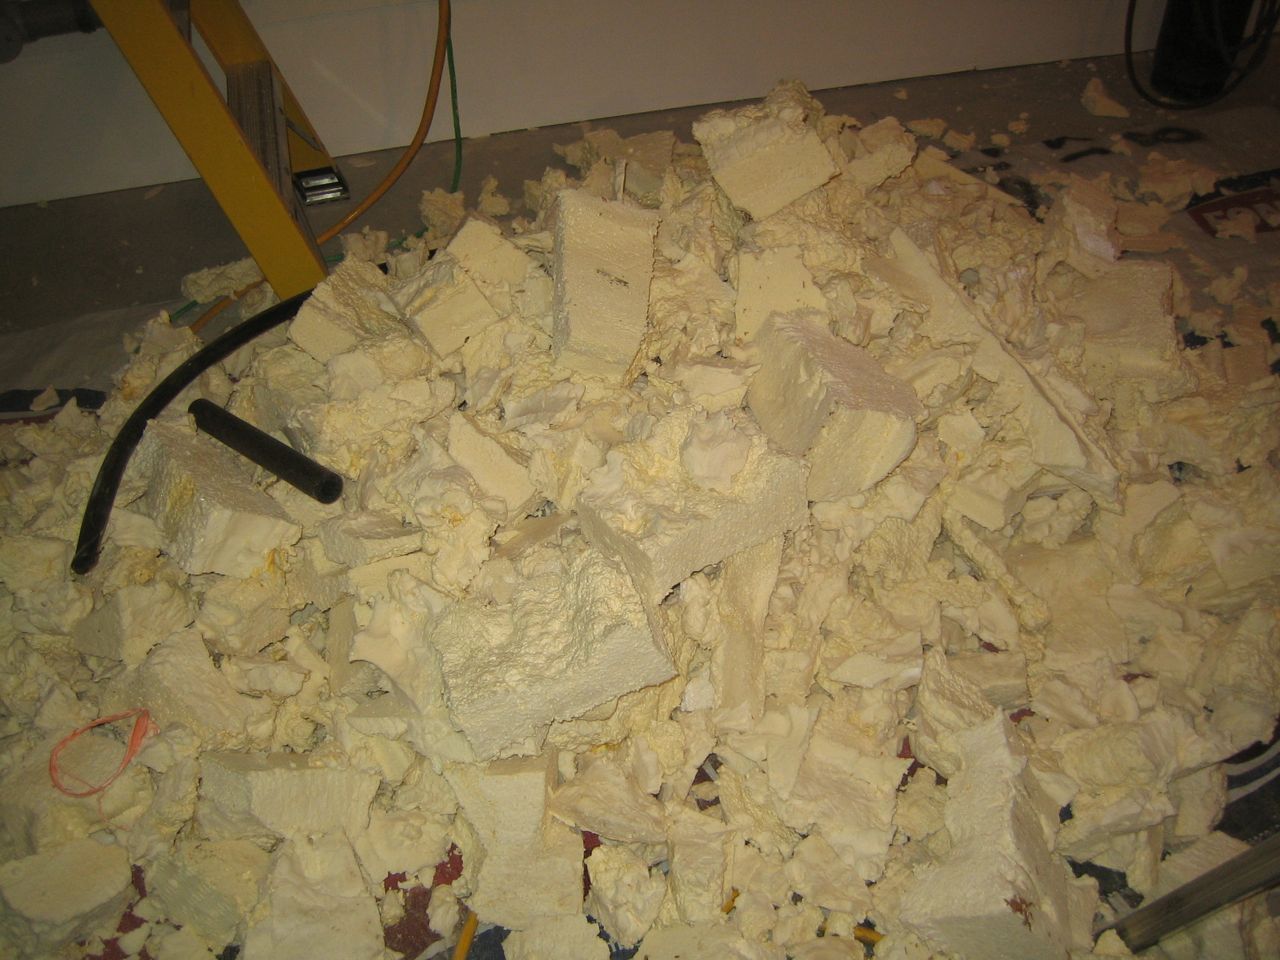
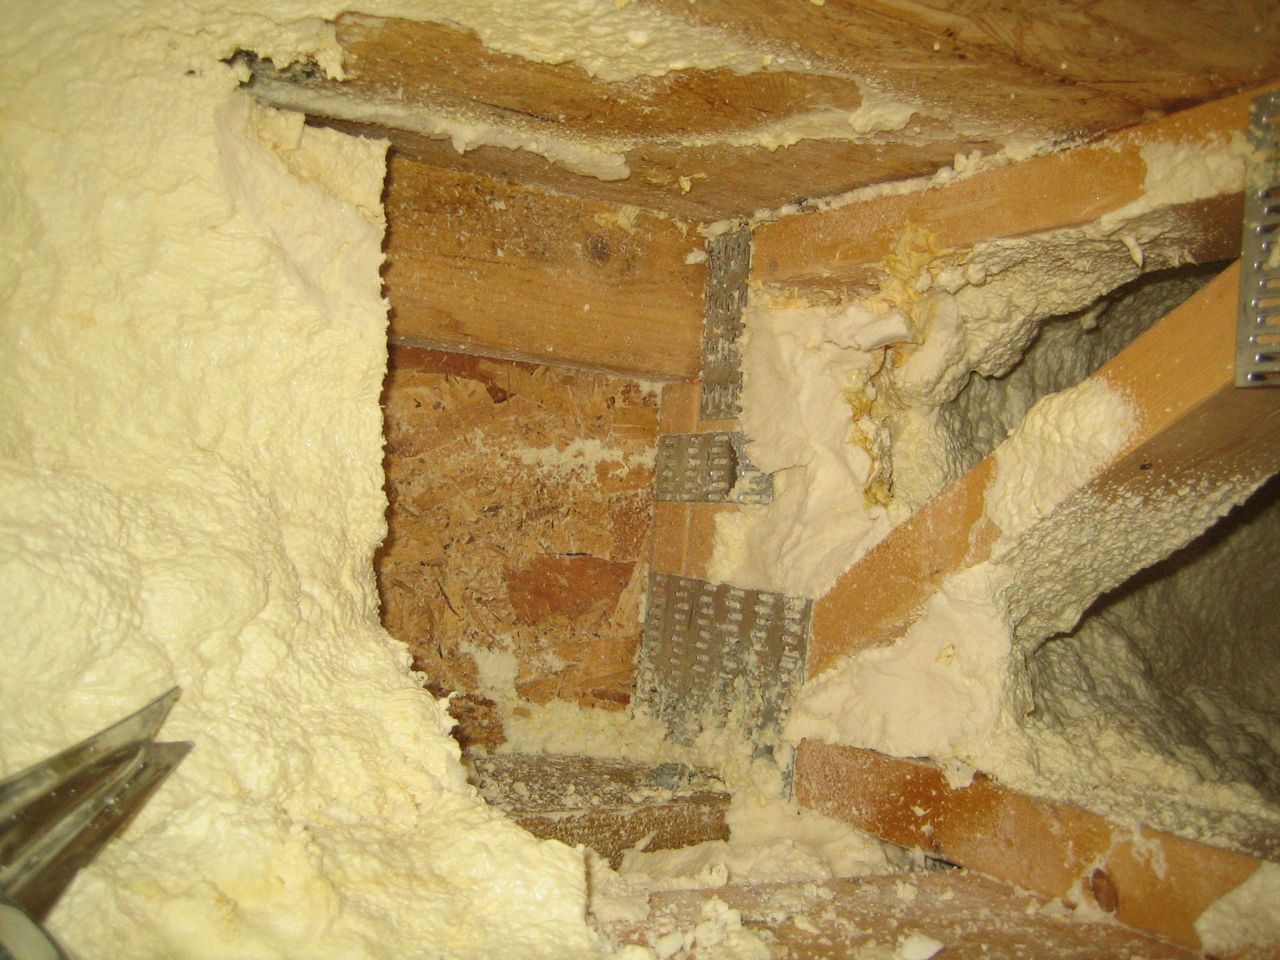
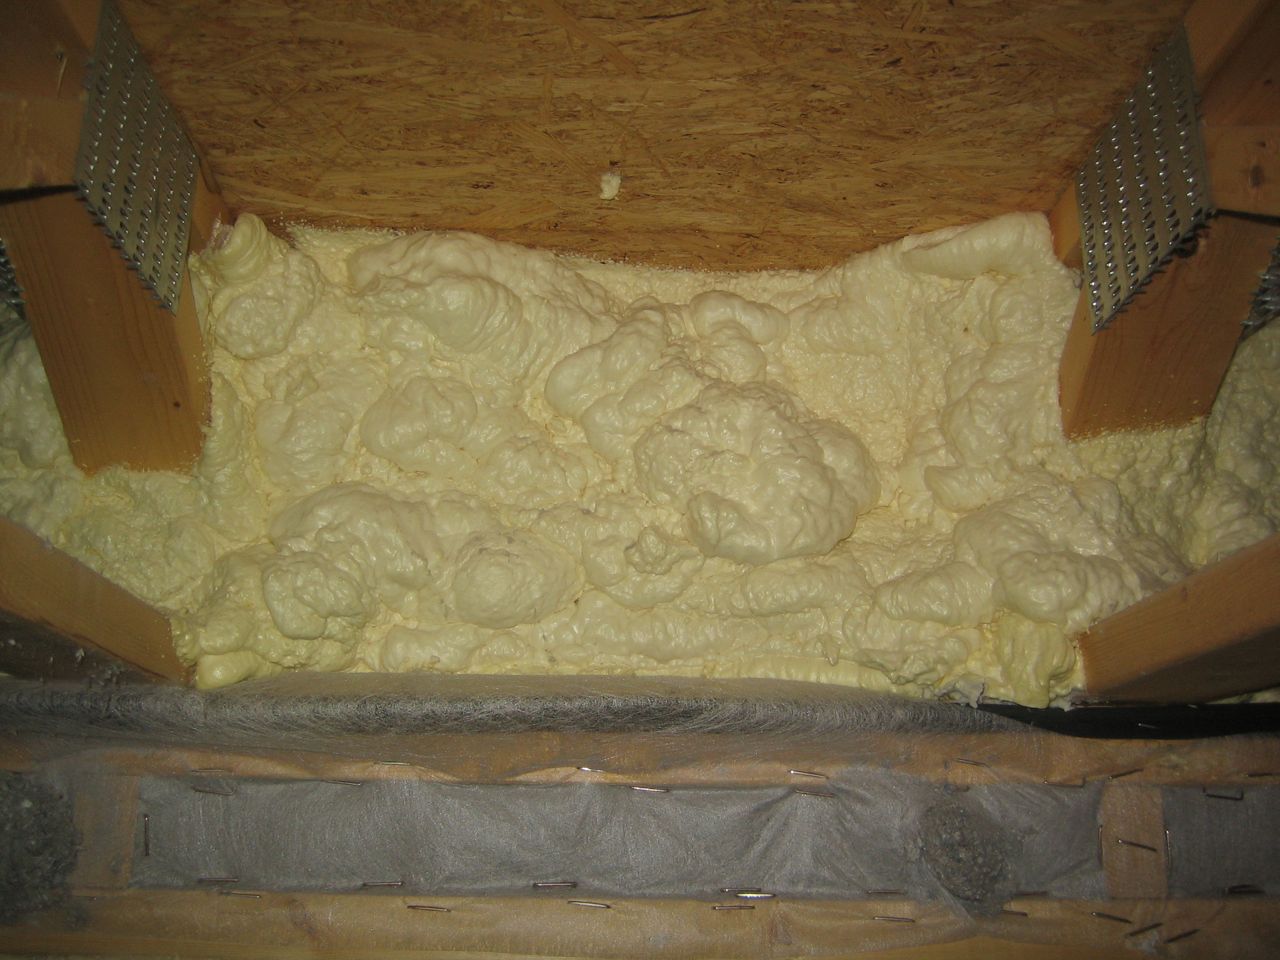
Removing bad foam is a nasty job. In our case, removing foam from a roughly two foot deep cavity at the rim joist area around 12 inch deep trusses with sharp metal plates. Not an easy job. My arms ached and even though I wore a mask and ventilated the space I still woke up with headaches the next day.
When I started pulling out the foam, I realized there were several areas where the foam had shrunken away from the sheathing by as much as an inch. I’m a bit concerned about this. Was this just due to the bad foam, or had this happened in other areas?
I tried to remove as much of the bad foam as I could, but there were areas at the corners where I couldn’t reach and areas behind ducts and wires that I didn’t want to be poking around with the serrated knife I was using to cut the foam into sections for easier removal.
I was able to remove roughly 80% of the bad foam. For the remaining areas, we just foamed over them.
Mostly happy ending
So far, our re-foaming efforts have been positive. The replacement foam kit provided free by the manufacturer yielded nice expanding foam that cured normally. We’re not quite finished, but I’m keeping my fingers crossed that we won’t encounter any more problems. I’m also hoping that we don’t encounter any more smelly issues when the temperatures begin to rise next summer.

Categories
- Air sealing 13
- Appliances & Fixtures 4
- Art 3
- Award 4
- Bathroom 8
- Batteries 1
- Decor 5
- Design 10
- Electrical 5
- Energy Calculations 13
- Energy Monitors 4
- Farm 1
- Finance 1
- Flooring 3
- Foundation 9
- Framing 8
- Heating 9
- House 7
- Insulation 8
- Kitchen 6
- Landscaping 3
- Lessons Learned 1
- Performance 60
- Plumbing 10
- Porch 5
- Radon 1
- Rainwater catchment 3
- Research / study 1
- Roof 7
- Septic / Waste water 2
- Sheetrock 6
- Siding 9
- Site Work 22
- Smart home 1
- Solar 64
- Solar Obsessed 10
- Stairs 2
- Surveying 3
- Ventilation 8
- Weather 1
- Windows & Doors 14
- plug-in 3
Archive
- Jan 2021 1
- Dec 2020 2
- May 2020 1
- Jan 2020 1
- May 2019 1
- Jan 2019 3
- Sep 2018 2
- Aug 2018 2
- Jan 2018 1
- Oct 2017 2
- Apr 2017 1
- Jan 2017 1
- Oct 2016 2
- Aug 2016 1
- Apr 2016 2
- Jan 2016 2
- Nov 2015 2
- Oct 2015 1
- Jul 2015 1
- May 2015 1
- Apr 2015 1
- Jan 2015 1
- Dec 2014 1
- Nov 2014 2
- Oct 2014 4
- Sep 2014 2
- Aug 2014 1
- Jul 2014 1
- Mar 2014 3
- Feb 2014 2
- Jan 2014 2
- Nov 2013 1
- Oct 2013 1
- Sep 2013 1
- Jul 2013 3
- Apr 2013 3
- Jan 2013 3
- Dec 2012 2
- Nov 2012 3
- Oct 2012 1
- Sep 2012 3
- Aug 2012 3
- Jul 2012 2
- Jun 2012 1
- May 2012 3
- Apr 2012 2
- Mar 2012 4
- Feb 2012 4
- Jan 2012 5
- Dec 2011 4
- Nov 2011 9
- Oct 2011 10
- Sep 2011 9
- Aug 2011 6
- Jul 2011 6
- Jun 2011 12
- May 2011 8
- Apr 2011 4
- Mar 2011 5
- Jan 2011 6
- Dec 2010 9
- Nov 2010 3
- Oct 2010 4
- Sep 2010 6
- Aug 2010 8
- Jul 2010 6
- Jun 2010 3
- May 2010 3
- Apr 2010 1
- Mar 2010 3
- Feb 2010 3
- Dec 2009 1
- Jun 2009 1
- May 2009 1
- Feb 2009 1
- Dec 2008 1
- Nov 2008 1
- Jun 2008 1